Every time I start painting mushrooms, it feels like stepping into an imaginary world. It’s as if I’ve arrived in a quiet forest, surrounded by the sense of adorable little animals hiding nearby. During this season, I’ll use beautiful shades of purple to paint some enchanting mushrooms!
If you need it, you can download the pencil sketch.
Hope you have fun!
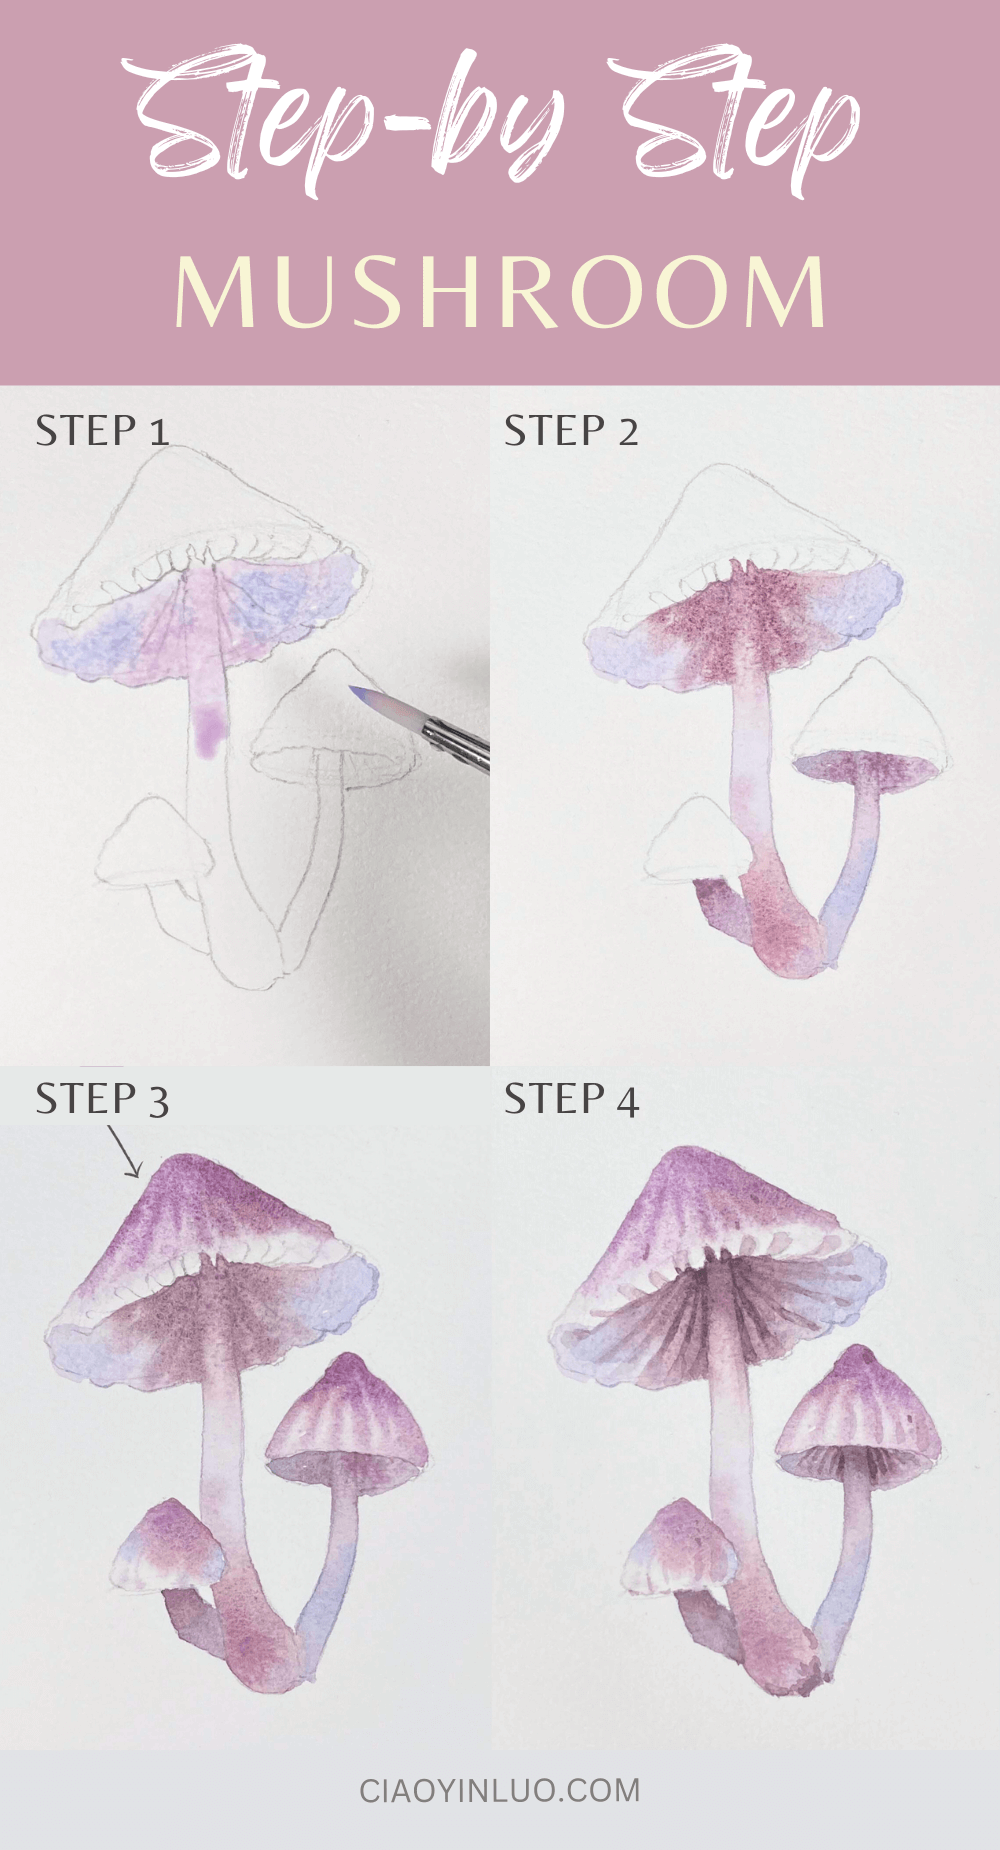
Table of Contents
Supplies list
Watercolor Paper: Arches Cold-Pressed Watercolor Paper
Brushes: Escoda Perla #8 / Escoda Versatil #10
Watercolors: For this beginner step-by-step watercolor tutorial series, I use Schmincke Horadam 24 Half-Pan Set. You can choose any brand and find similar colors.
Colors:
Manganese violet
Lavender
Burnt Sienna
Sepia Brown
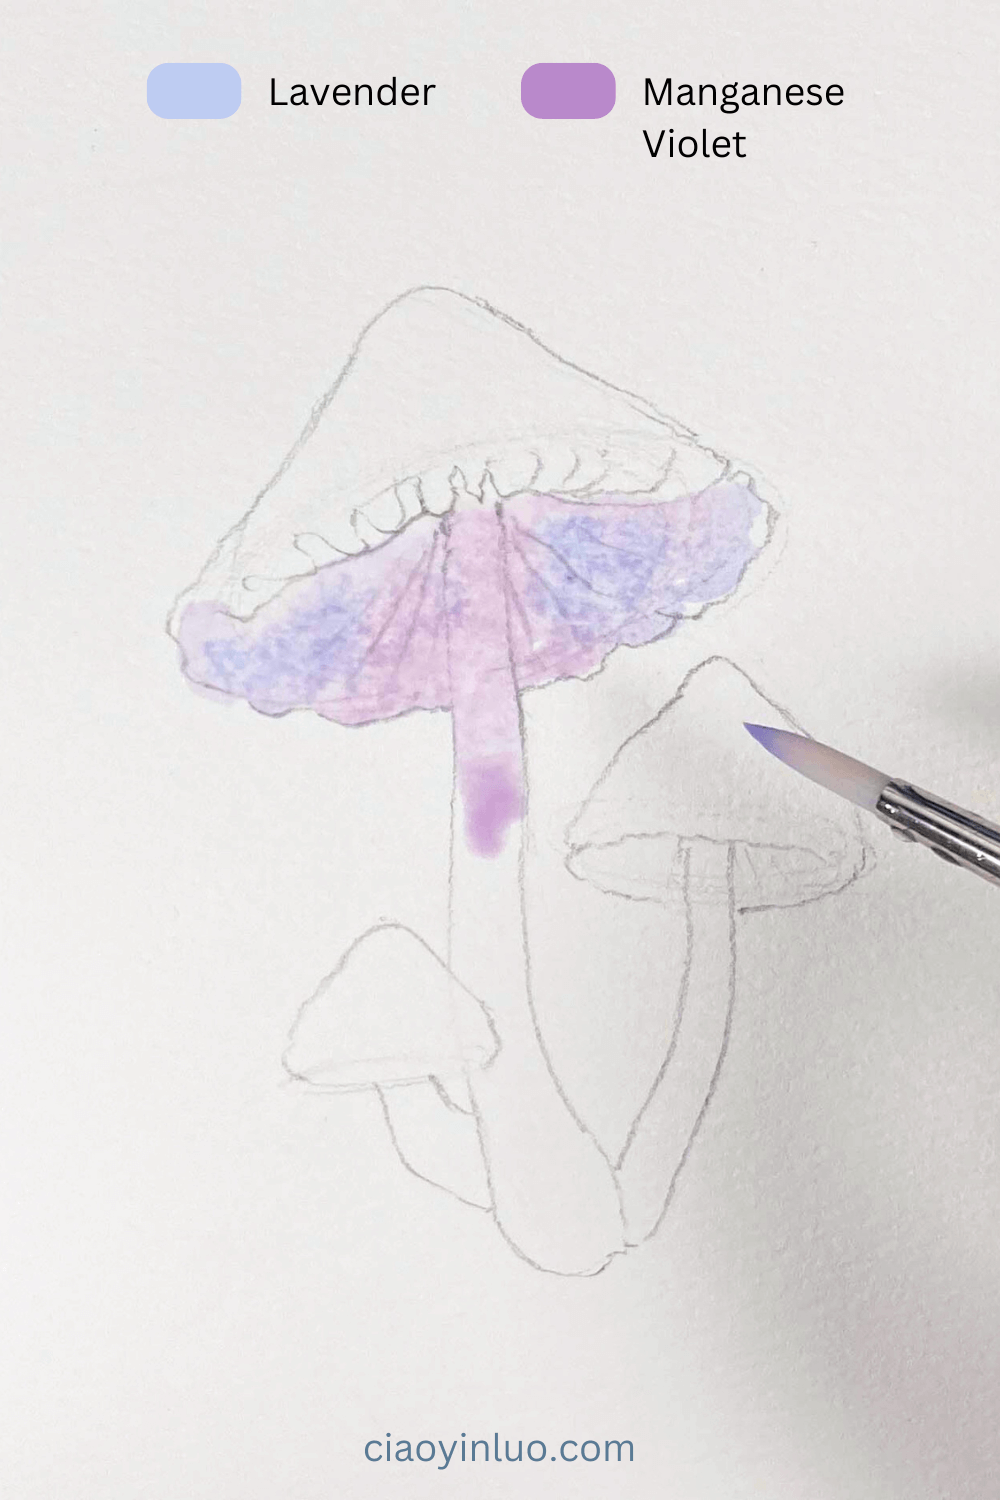
Step 1: Mushroom Stalk
I began with the gills under the mushroom cap and the stalk. Using diluted Lavender and Manganese Violet, I created a gradient effect, letting the colors flow freely.
Step 2: Deepening Specific Areas
Before the first layer completely dried, I mixed Manganese Violet and Burnt Sienna and applied it to the center of the mushroom cap and the base of the stalk. The colors should not be too vibrant—if they are, you can tone them down by adding a cooler brown, such as Sepia Brown.
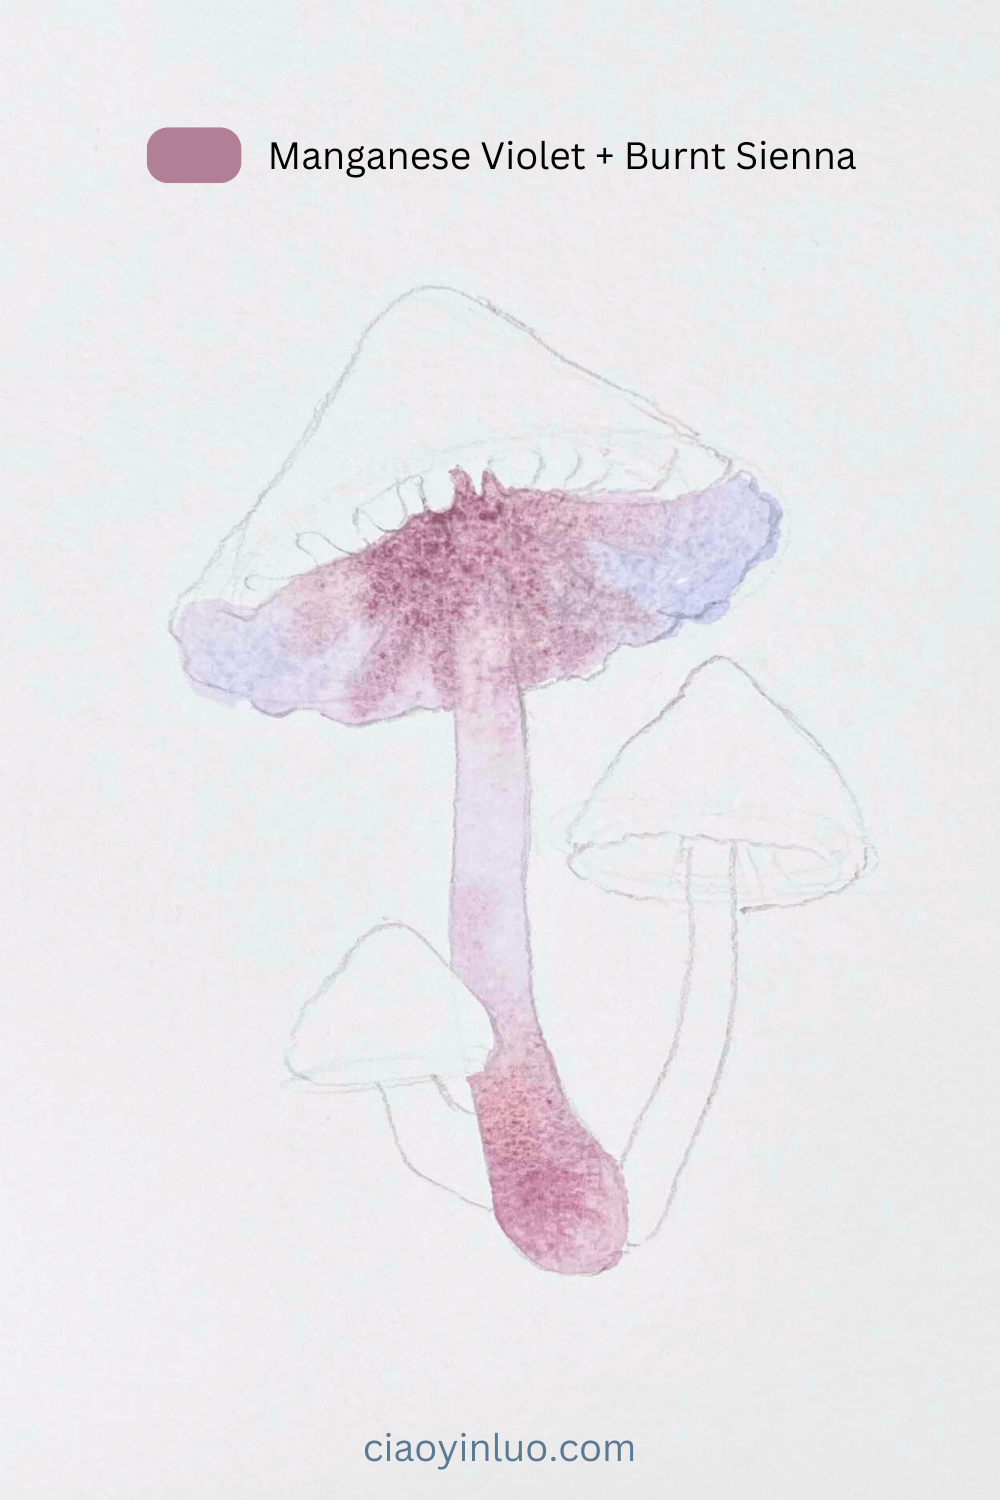
Using the same technique, I painted the other two mushrooms, creating the first wash with different ratios of Lavender, Manganese Violet, and Burnt Sienna, and deepened the base of the stalks and the underside of the caps.

Step 3: Mushroom Cap
Next, I moved on to painting the caps. I found Manganese Violet to be quite vivid, so I mixed in a bit of Burnt Sienna to reduce the brightness.
Starting at the top of the cap, I used more concentrated color and worked downward to create a gradient. Finally, while the layer was still slightly wet, I added some faint stripes so that the edges of the stripes wouldn’t appear too sharp. Then, we waited for this layer to dry.
,

Step 4: Details
By mixing Manganese Violet and Sepia Brown, I created a deep purplish-brown, which I used to paint the folds on the mushroom gills. When painting the folds, I let the color become lighter as it extended outward.

After completing the folds on all three mushrooms, we’re done!

Now you can paint mushrooms with watercolor!
More purple Mushroom painting Ideas!
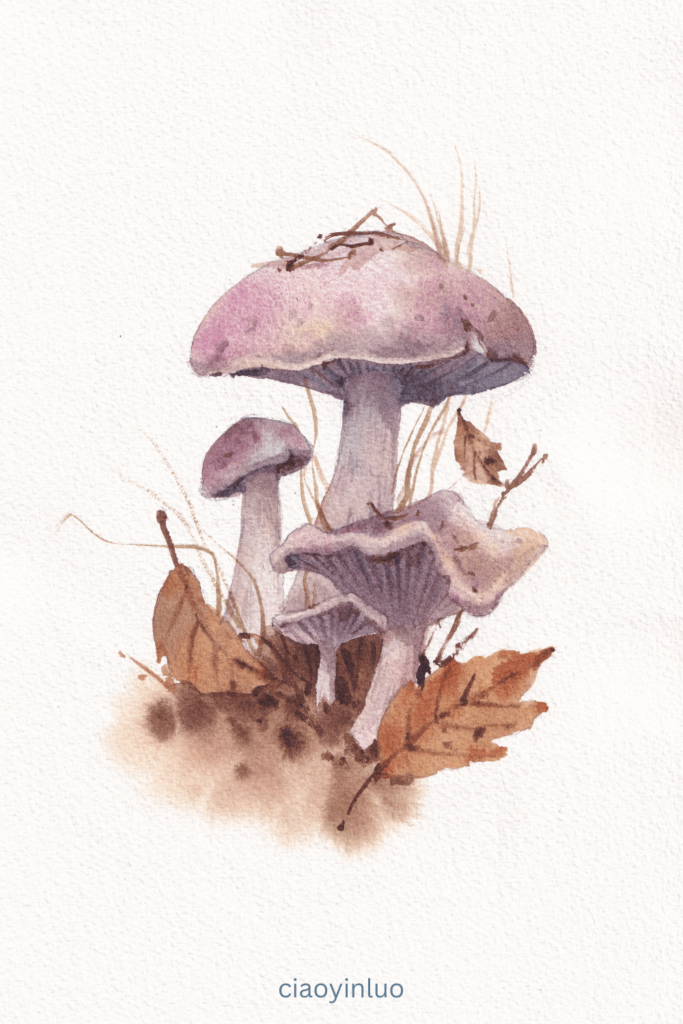
This is another mushroom illustration using purple tones. You can add more elements to your mushrooms to make them more vivid and lively! In this particular piece, the purple I used was Cobalt Violet Light (Holbein).
I hope you enjoyed this mushroom illustration tutorial.
Thank you so much for finding and trying out this tutorial. I hope it was helpful and brought you joy in using watercolors!
Feel free to share your results in the comments below—I’d love to see how your mushroom illustration turned out. If you have any suggestions for what I should paint next, let me know!
See you in the next lesson!
Related Blog Posts:
【Watercolor Illustration】Mushrooms and Little Mice
Watercolor Tutorial: Snowy Mountain Landscape – Perfect for Beginners
How to paint Forget-me-not flower: Step-by-Step Easy watercolor Tutorial
