The sunset sky is always filled with enchanting colors, with shades of orange, gold, and purple-blue blending together, making you want to capture this moment on paper. This simple watercolor tutorial will guide you step by step on how to use just a few colors and easy techniques to effortlessly paint a beautiful sunset scene.
Hope you have fun!
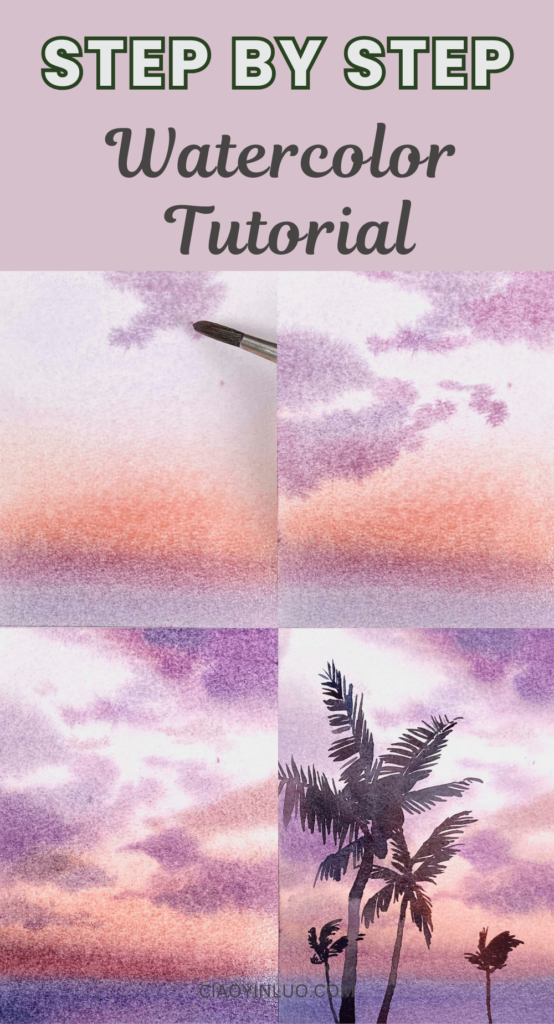
Table of Contents
Supplies list
Watercolor Paper: Arches Cold-Pressed Watercolor Paper
Brushes: Escoda Perla #8 / Escoda Versatil #10
Watercolors: For this beginner step-by-step watercolor tutorial series, I use Schmincke Horadam 24 Half-Pan Set. You can choose any brand and find similar colors.
Colors:
Manganese Violet
Cadmium Red Light
Lavender (Holbein)
Indigo
Sepia Brown
Step 1: Sky
In this step, we will paint the base color of the sky. In this piece, we mainly use warm tones. Starting from the top, I dilute Manganese Violet to create a soft purple hue. Moving towards the lower part of the sky, I add a richer orange tone using Cadmium Red Light.

Next, I apply a reddish-purple hue to the bottom of the sky and use Lavender mixed with Manganese Violet to paint the water surface.
Tip: Ensure the sky remains sufficiently wet, as we will use the wet-on-wet technique in the next step to add clouds. However, if you notice that some areas of the paper have started to dry, don’t worry. Simply wait until the paper is completely dry, then use a large brush to apply a layer of water over the sky before moving on to the next step.

Step 2: Cloud
At this stage, the sky should be in a moist state. Using the wet-on-wet technique, we add clouds. I start by using a diluted Manganese Violet to paint soft clouds. The edges of the clouds will appear gentle and blended, rather than sharp or defined.
,

You can switch between medium and small watercolor brushes to create clouds of different sizes.
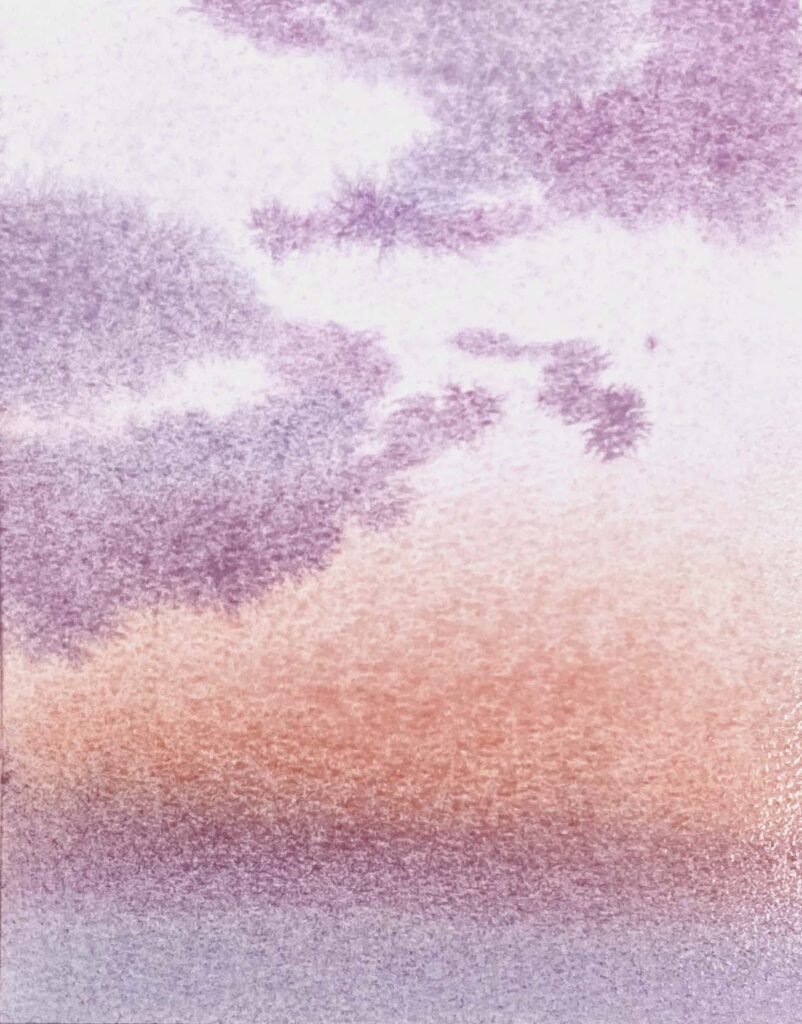
Step 3: Adding More Layers
Continue building layers by adding more clouds using a richer Manganese Violet or mixing Manganese Violet with a hint of orange or blue to create variations in tone.
In the image below, aside from the clouds, I also used deeper colors to enhance the bottom of the sky and the water surface. Then, I let this layer dry completely.
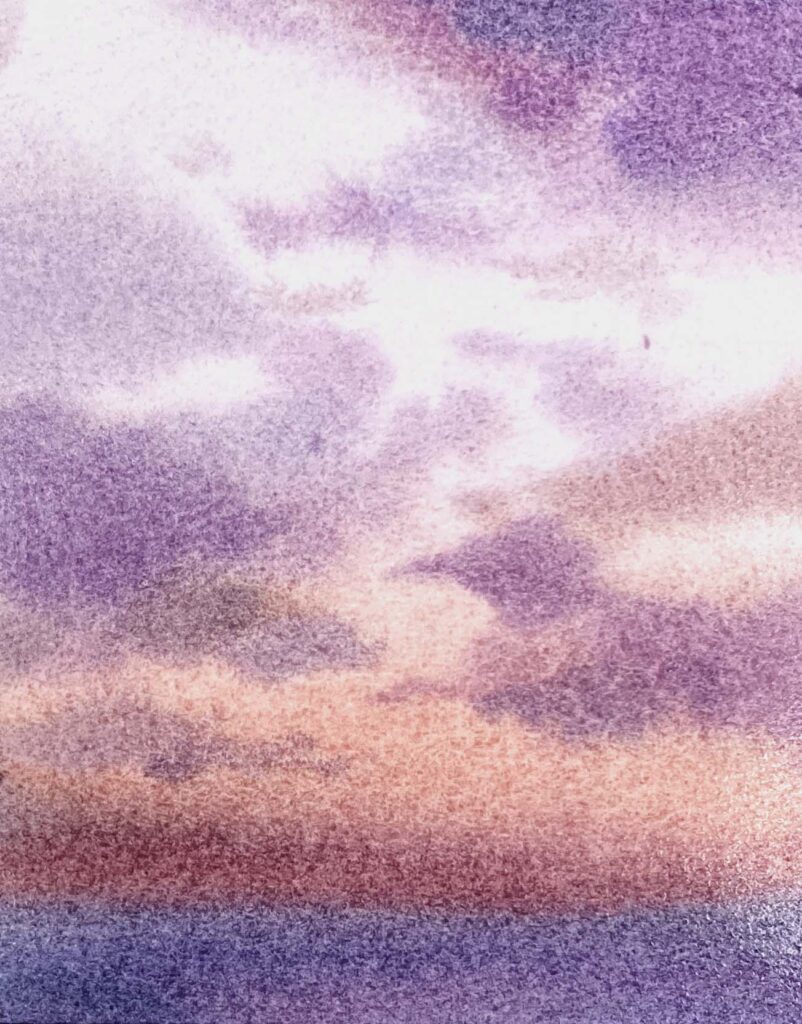
Step 4: Foreground
Once the background is fully dry, let’s add some foreground elements—coconut trees.
We’ll focus on the silhouettes rather than internal details, using the previously applied purple and orange tones, along with deeper shades mixed with Indigo or Sepia Brown.
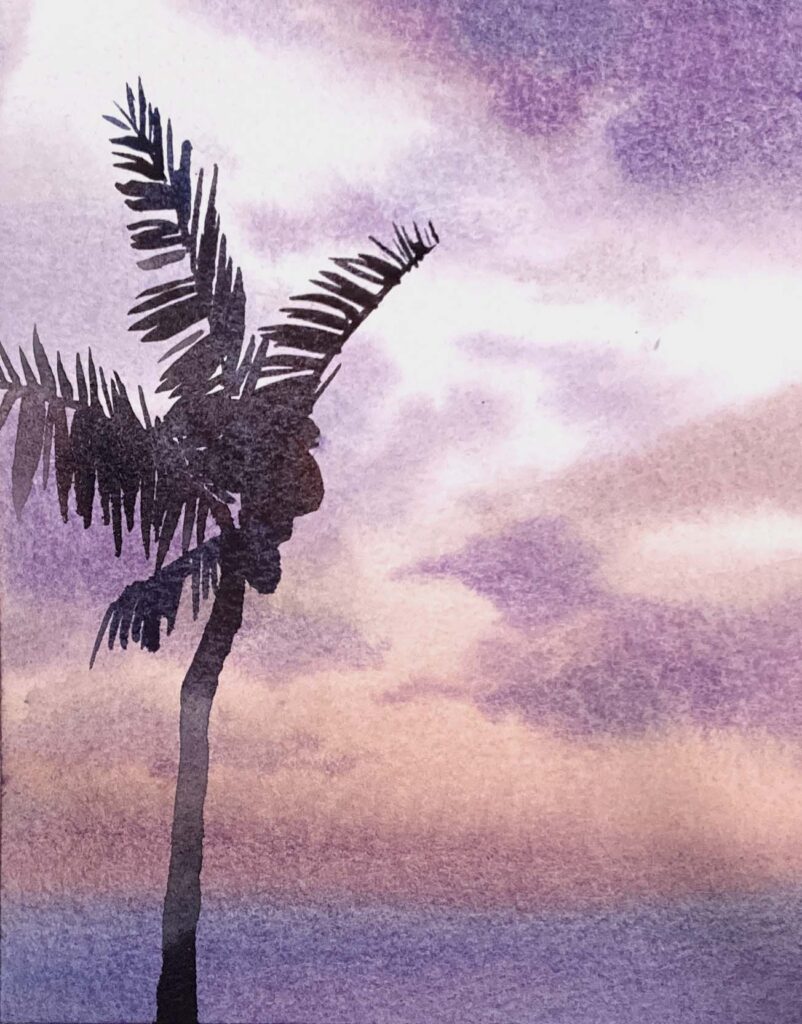
The tones don’t have to be uniform. You can make some areas darker or lighter, add more orange (Cadmium Red Light) for a warmer effect, or use more Indigo for a cooler dark tone.
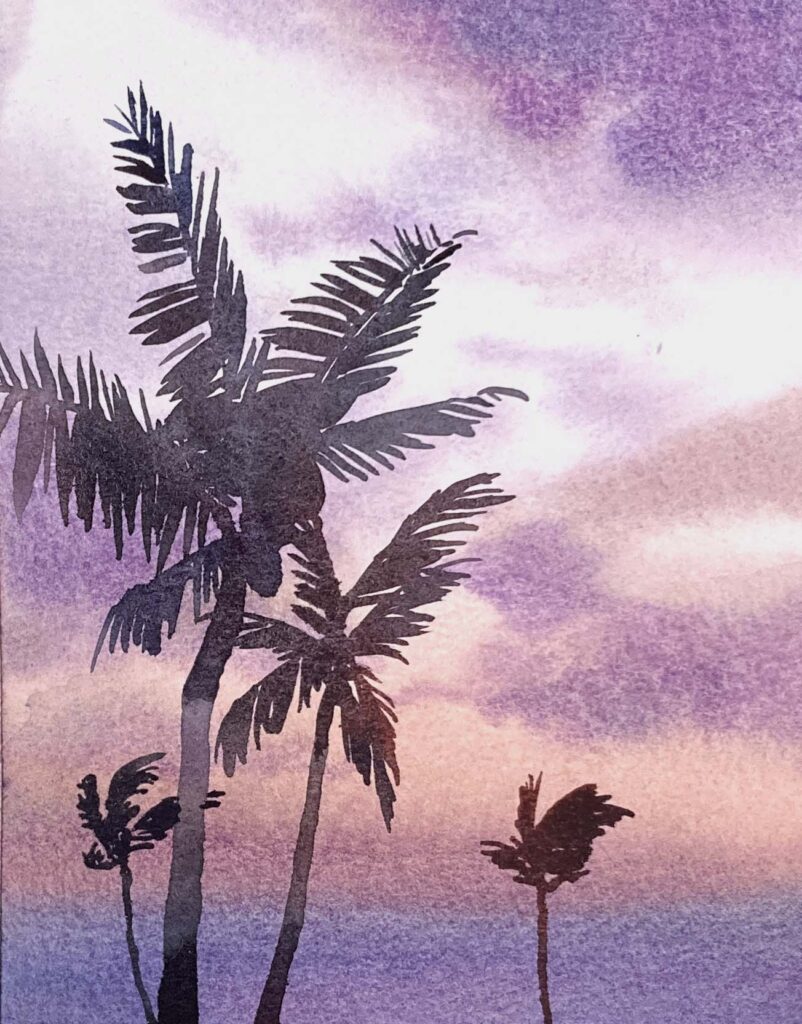
With these four simple steps, we’ve completed a beautiful sunset watercolor painting!

I hope you enjoyed creating this sunset scene with me!
Thank you so much for following this tutorial, and I hope it brought you both guidance and joy in your watercolor journey.
If you have any suggestions or requests for future tutorials, feel free to let me know.
See you in the next tutorial!
Related Blog Posts:
【Watercolor Illustration】Mushrooms and Little Mice
Watercolor Tutorial: Snowy Mountain Landscape – Perfect for Beginners
How to paint Forget-me-not flower: Step-by-Step Easy watercolor Tutorial
