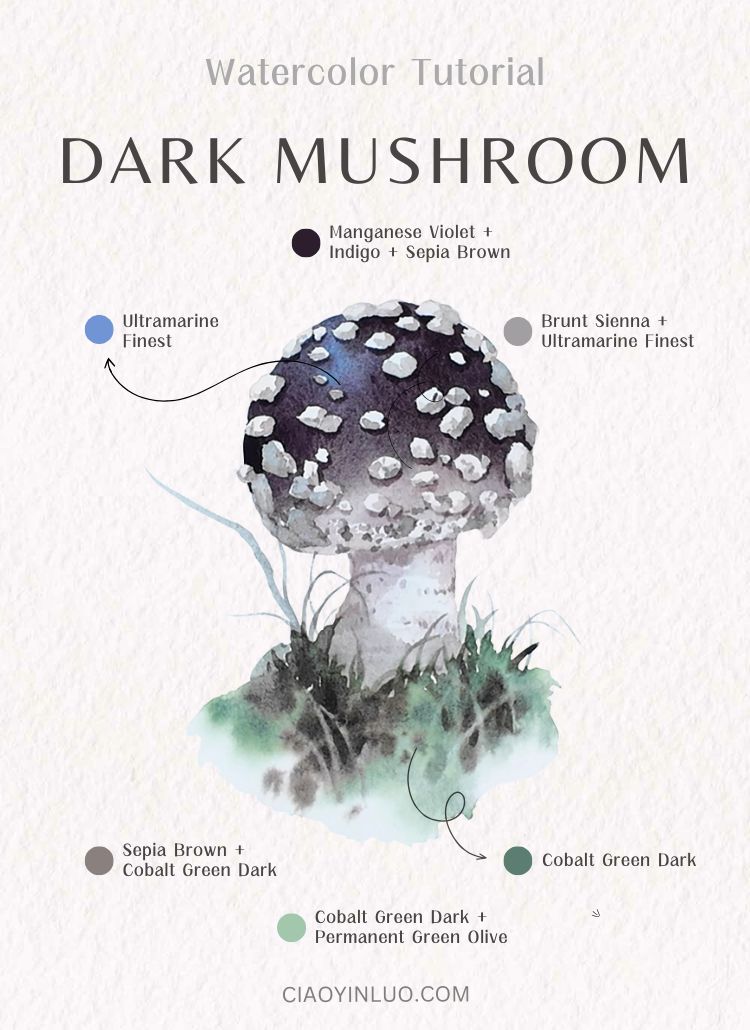
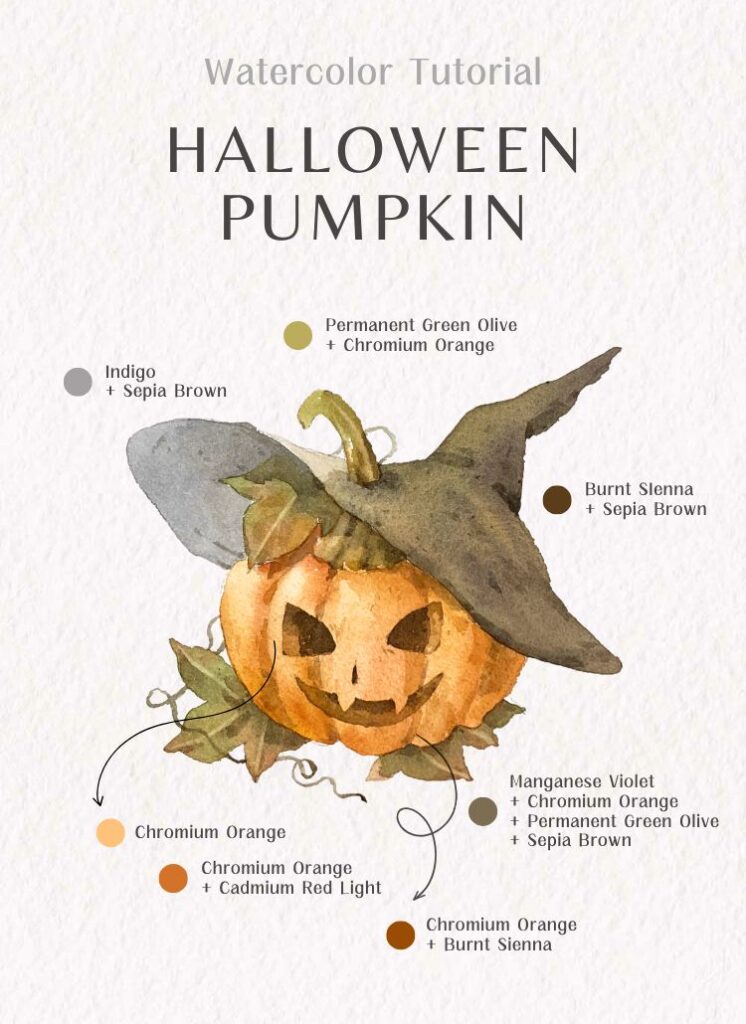
In this tutorial, we’ll create a whimsical Halloween illustration featuring a glowing pumpkin and a wizard hat. Along the way, you’ll practice blending warm autumn hues, balancing light and shadow, and adding fun textures that bring character to your painting.
Painting Tools
- Watercolor Paper: Arches Cold-Pressed Watercolor Paper
- Brushes: Escoda Perla #8 / Escoda Versatil #10
- Watercolors: For this beginner step-by-step watercolor tutorial series, I use Schmincke Horadam 24 Half-Pan Set. You can choose any brand and find similar colors.
Colors:
Chromium Orange Hue, Cadmium Red Light, Burnt Sienna, Permanent Green Olive, Manganese Violet, Indigo, Sepia Brown
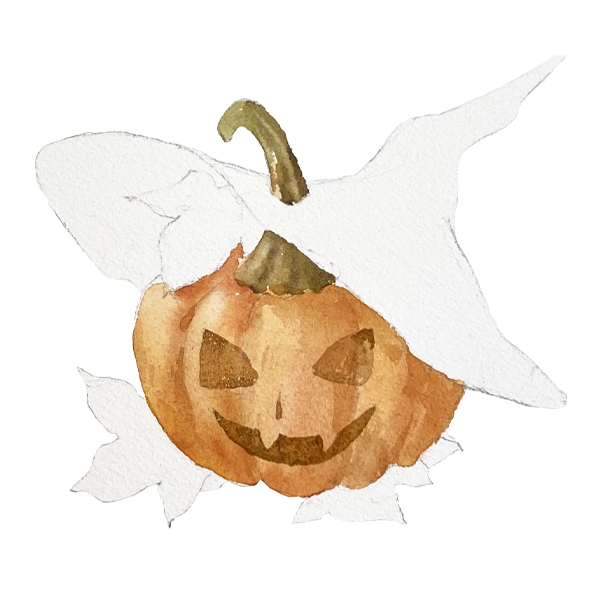
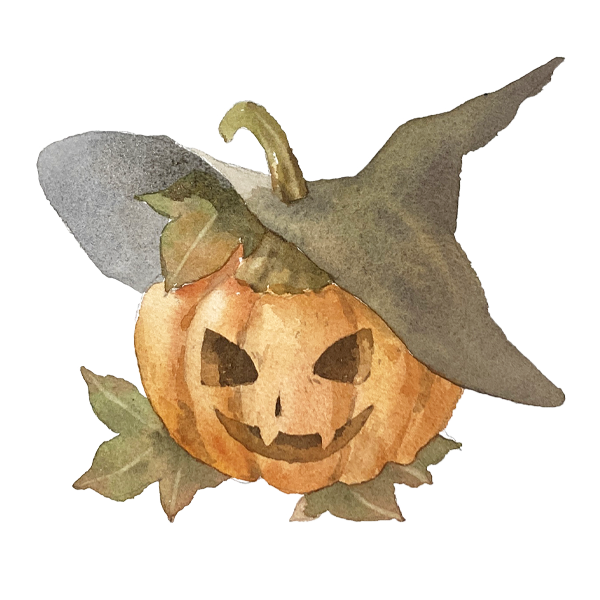
1. Pumpkin
Use Chromium Orange Hue to paint the pumpkin base color. For the shadow areas, mix Chromium Orange Hue with Cadmium Red Light or Burnt Sienna. We can add the shadows while the base is still wet, or after it has dried with some dry brush strokes.
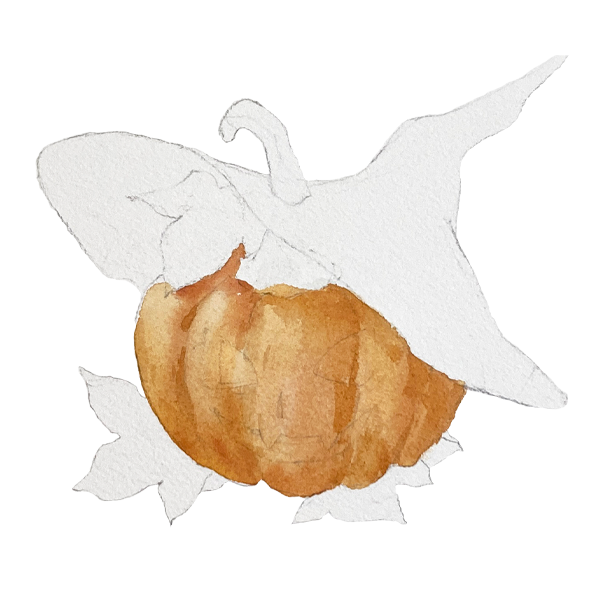
2. Pumpkin Stem
Mix some Permanent Green Olive into the orange tones from the previous step to paint the pumpkin stem base color. After the first layer dries, load more pigment to paint the darker areas.
Use Burnt Sienna + Sepia Brown to paint the pumpkin’s eyes, nose, and mouth, then let this layer dry.
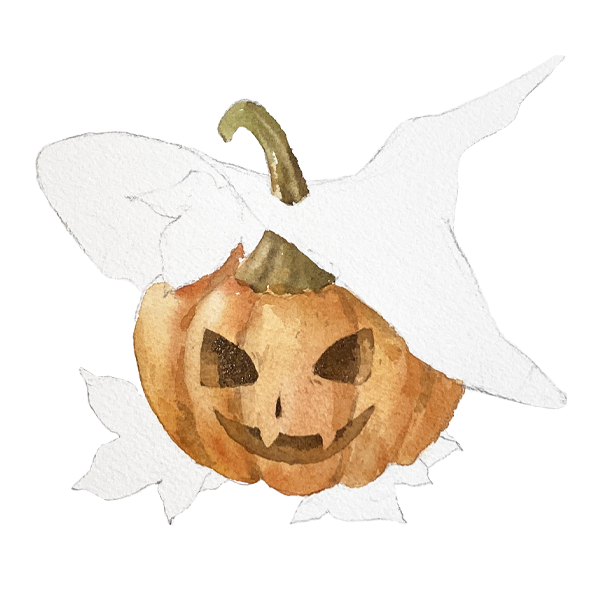
3. The thickness
Use the same orange, green, and brown tones mentioned above to complete all the leaves.
4. Leaves
Preserve the pumpkin’s thickness and use Sepia Brown to paint the deepest inner parts of the pumpkin.
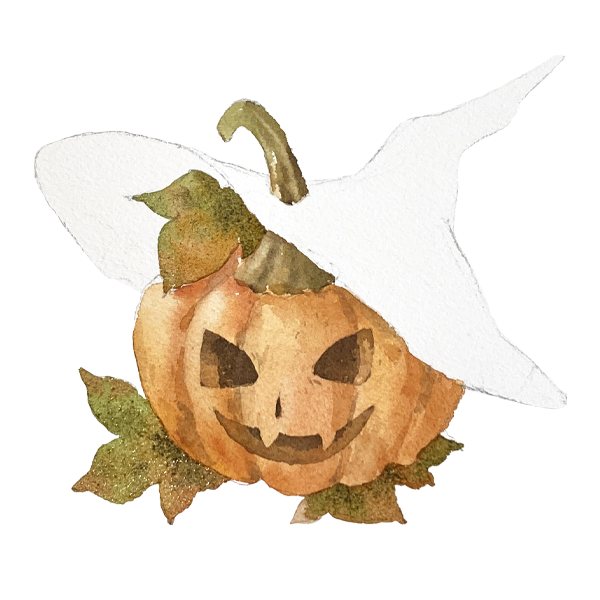
When the leaves are almost dry, lift the paint with a watercolor brush to create vein lines.
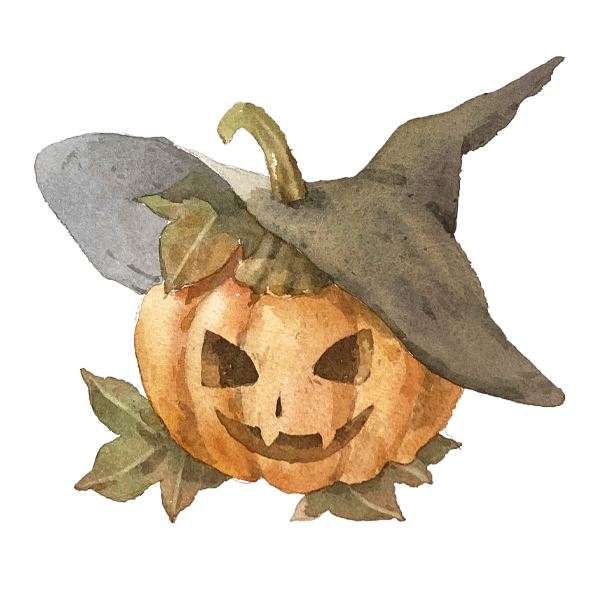
5. Wizard hat
To harmonize the overall color palette, I plan to use similar tones for the wizard hat, but with some added Manganese Violet. First, paint the outer part of the wizard hat and let it dry.
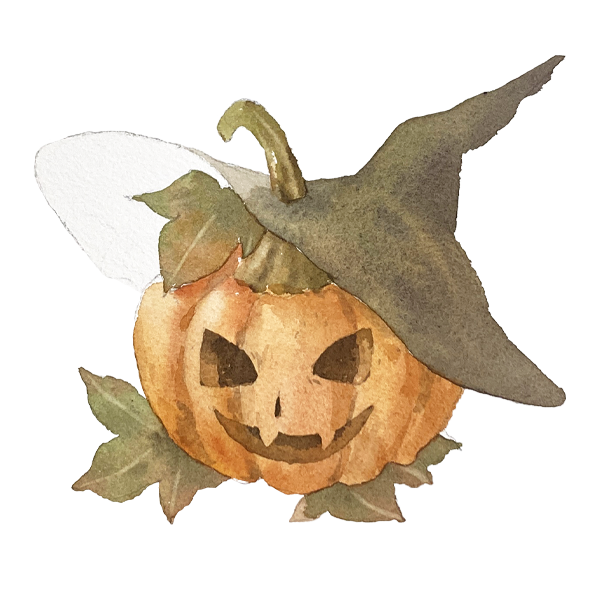
For the inside of the hat, I used a mix of Indigo + Sepia Brown. At the same time, I added shadows under the leaves and pumpkin stem.
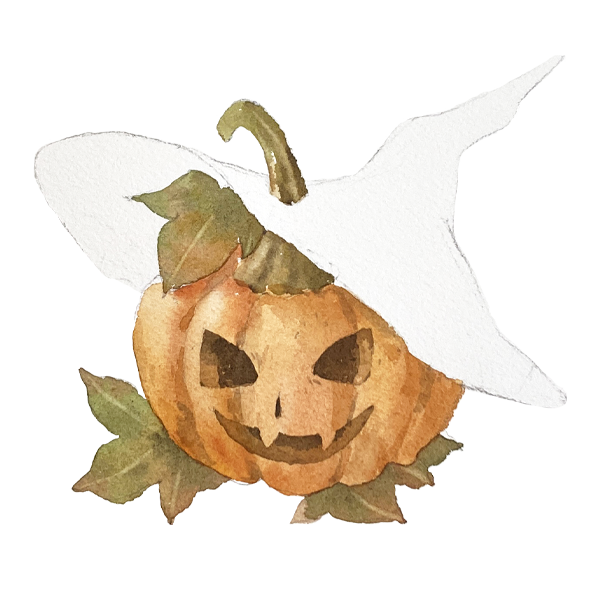
6. Details
Finally, we can paint the shadows of the leaves and the pumpkin.
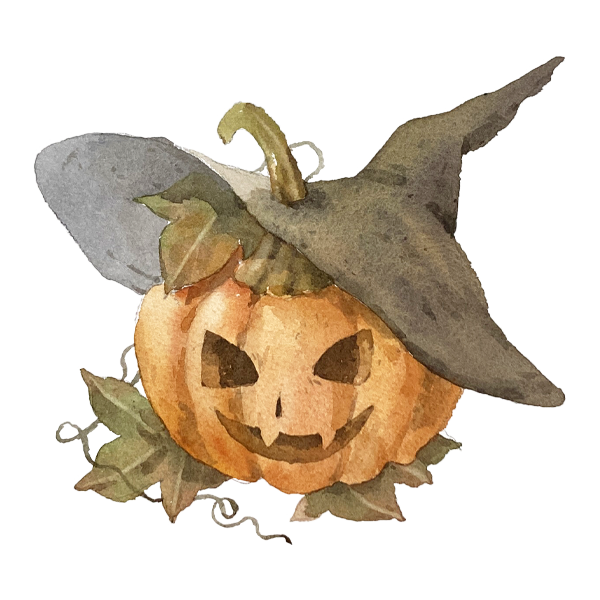
To enhance the texture of the objects, simply add some dots and short strokes to the worn-out wizard hat and pumpkin to make the surfaces look rougher.
If you’d like even more decorative details, you can add the pumpkin’s tendrils to make the illustration richer.
I hope this tutorial inspires you to experiment with watercolor shadows, textures, and playful details in your Halloween art. Don’t be afraid to add your own twist—maybe some extra magical accessories on the hat.
If you have any questions or would like to share your illustration, feel free to leave a comment—I’d love to see your Halloween pumpkin and wizard hat! 🎃
Related Blog Posts:
Learn how to paint watercolor Himalayan blue poppy
Lean how to paint watercolor Pansies
Learn how to paint Catharanthus roseus with watercolor