The forget-me-not flower has adorable and delicate blue petals with a vibrant yellow center. Its simple shape makes it an ideal subject for beginners.
In this step-by-step guide, I will share the process of painting it with watercolor, starting with the details of the flower’s center and then building up the soft petals to bring the flower to life.
Each stage is accompanied by images and explanations to help you follow along easily. Let’s get started.
By the way, if needed, you can download the forget-me-not pencil sketch.
Hope you have fun!
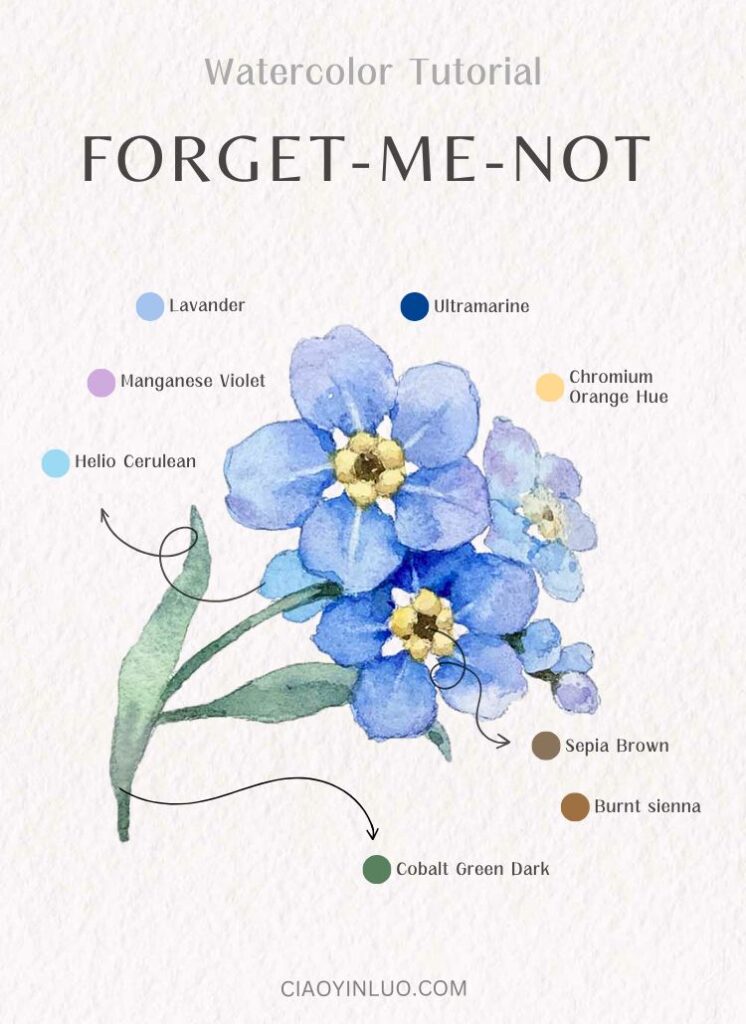
Table of Contents
Painting Tools
- Watercolor Paper: Arches Cold-Pressed Watercolor Paper
- Brushes: Escoda Perla #8 / Escoda Versatil #10
- Watercolors: For this beginner step-by-step watercolor tutorial series, I use Schmincke Horadam 24 Half-Pan Set. You can choose any brand and find similar colors.
Colors:
Chrome Yellow Deep
Burnt Sienna
Sepia Brown
Lavender (Holbein)
Ultramarine
Manganese Violet
Helio Turquoise
Cobalt Green Dark
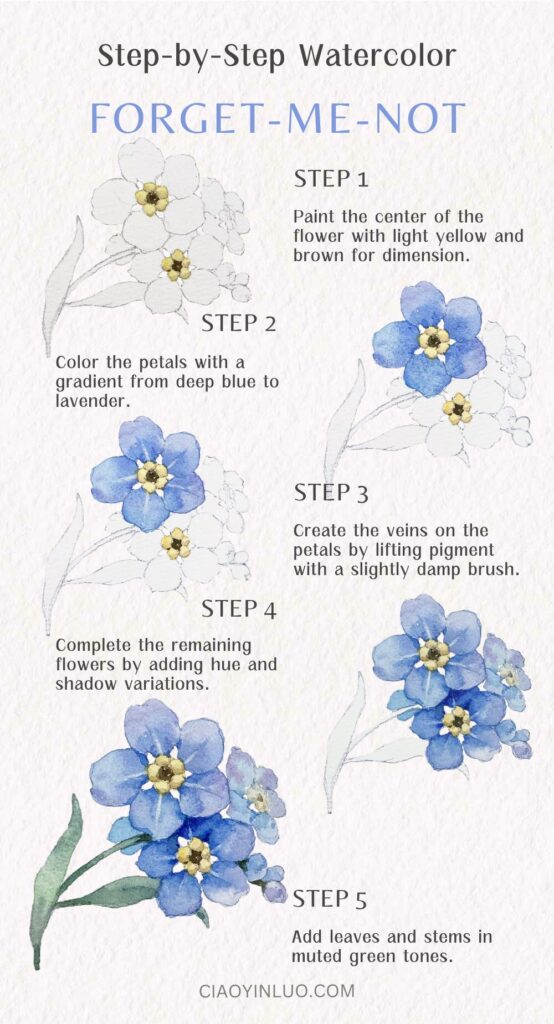
Step 1: Draw the flower’s center
First, we start with the center of the flower. Dilute Chrome Yellow Deep to create a base layer. Once it’s dry, add a touch of brown to the light yellow and apply it to the bottom of the yellow granules to give them more dimension.
Finally, use Burnt Sienna mixed with Sepia Brown to paint the hollow at the center of the flower.

Step 2: Paint the main flower petals
Next, we move on to the petals. Let’s take it slow and begin with the main flower.
You can experiment with different blue tones for the petals.
I primarily use Lavender for the main areas of the petals, adding a hint of Manganese Violet to the outer edges. For the inner part of the petals, closer to the center, apply a deeper blue, such as Ultramarine.
Remember to leave the white granules unpainted!

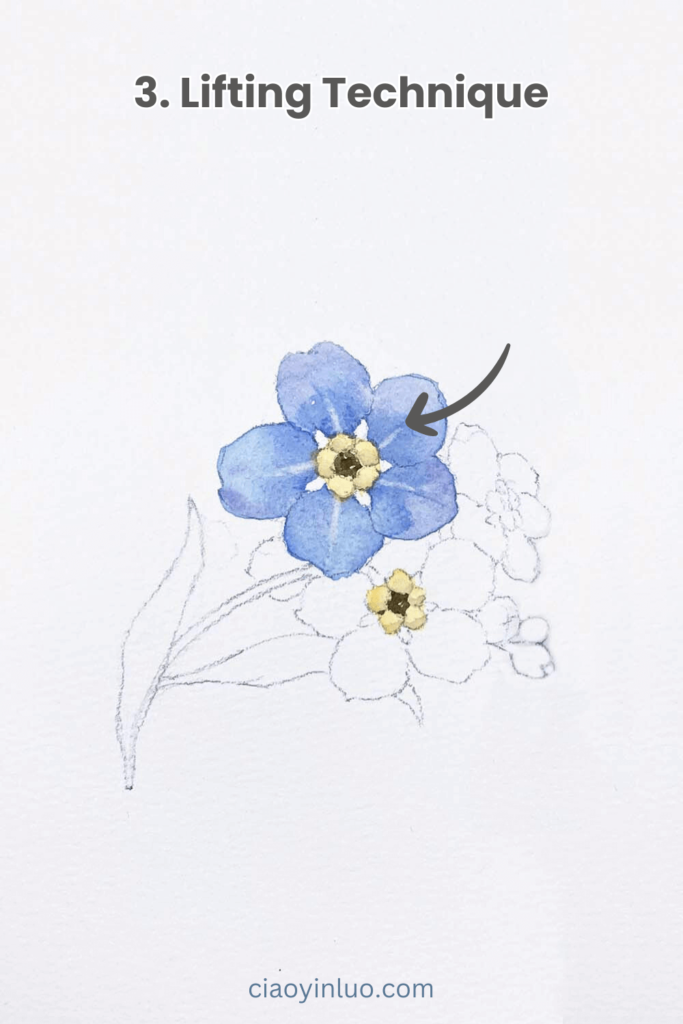
Step 3: Lifting Technique
Once the base layer of the petals is nearly dry or fully dry, use a slightly damp small brush to gently lift pigment from the center of each petal.
Work outward from the flower’s center in a consistent motion rather than scrubbing back and forth. You’ll notice the paper’s natural color reappearing as the blue pigment is lifted.
This technique creates vein-like lines on the petals, but they don’t need to be sharply defined or precise. Lifting the pigment gives them a softer, more natural appearance.
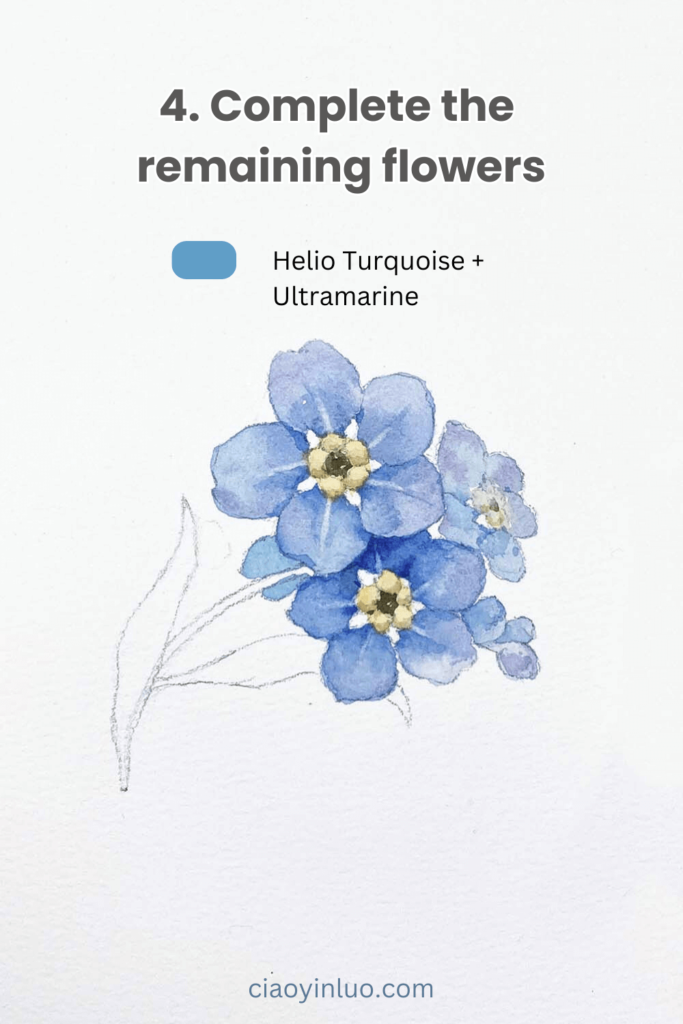
Step 4: Complete the remaining flowers
Next, complete the remaining petals using similar colors. You can adjust the proportions of blues and purples or even add a touch of pink.
For the lower flower, I deepened the upper part to make the main flower above stand out.
In the remaining buds and petals, I blended different shades of blue, such as Helio Turquoise, to enrich the tones and create subtle contrasts between petals in the foreground and background.
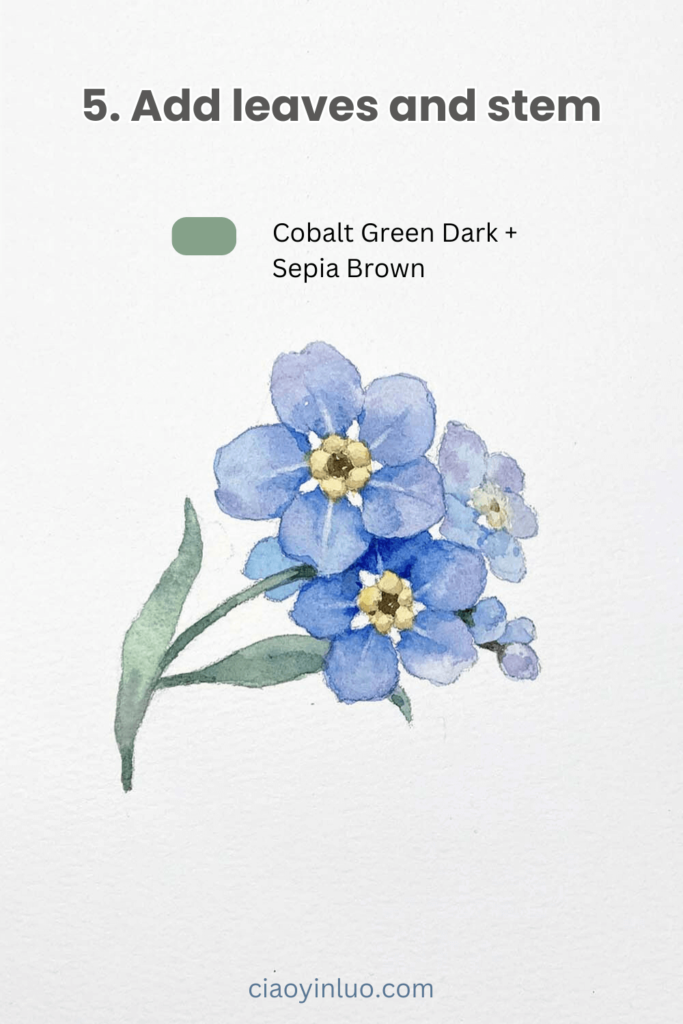
Step 5: Add leaves and stem
In the final steps, we’ll use green tones for the leaves and stems.
To complement the flowers, the green tones shouldn’t be too vibrant.
I used Cobalt Green Dark mixed with a touch of Sepia Brown. Deepen areas near the stem and where the stem meets the flowers to avoid a flat appearance.
We’re all done!
I hope you enjoyed painting your forget-me-not flowers.
Thank you so much for finding this tutorial and giving it a try.
I hope it was helpful and brought you some joy in using watercolors!
Feel free to share how your forget-me-not flowers turned out in the comments below.
If you have any suggestions for what I should paint next, let me know—I’m just as excited as you are for the next tutorial.
See you in the next lesson!
Related Blog Posts:
Watercolor Tutorial: Snowy Mountain Landscape – Perfect for Beginners
