The festive Christmas atmosphere is getting stronger, and it’s time to make some cute Christmas cards for your family and friends.
I’ll be sharing lots of Christmas-themed illustration tutorials so you can create a series of adorable cards too!
In this post, you’ll learn how to paint a beautiful watercolor Christmas tree, complete with glowing ornaments and subtle details, perfect for adding a personal touch to your holiday cards. Let’s get started!
Oh, and if you need it, you can download the pencil sketch.
Hope you have fun! 🎄

Table of Contents
Painting Tools
Watercolor Paper: Arches Cold-Pressed Watercolor Paper
Brushes: Escoda Perla #8 / Escoda Versatil #10
Watercolors: For this beginner step-by-step watercolor tutorial series, I use Schmincke Horadam 24 Half-Pan Set. You can choose any brand and find similar colors.
Colors:
Phthalo Green
Ultramarine
Yellow Ochre
Burnt Sienna
Sepia Brown
Masking Fluid: I use Schmincke in this tutorial.
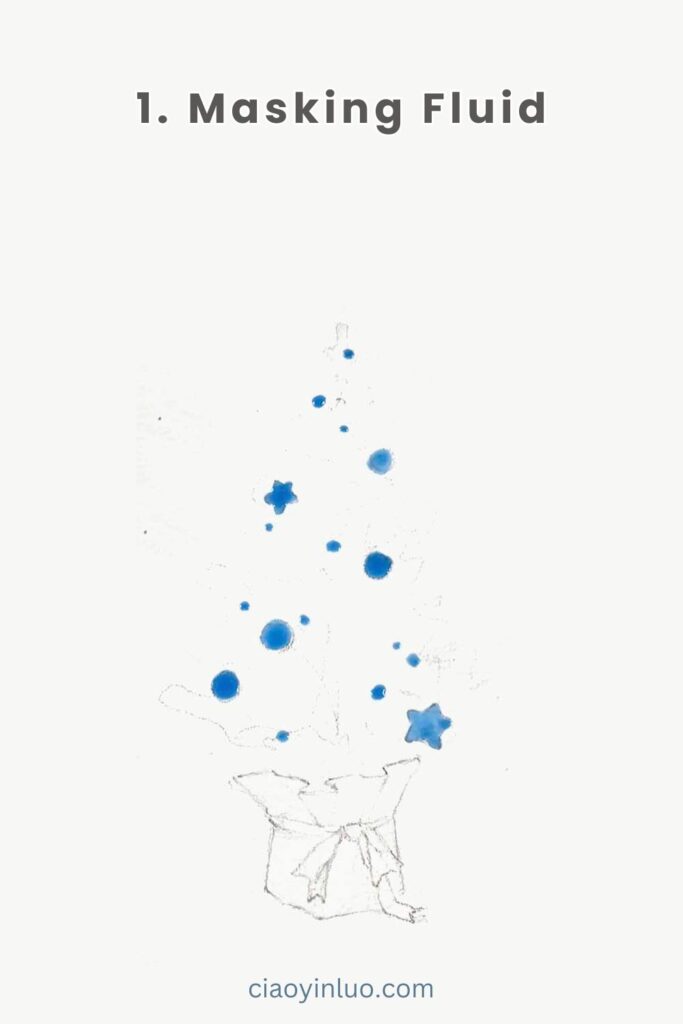
Step 1: Masking Fluid
Before painting with watercolors, I apply masking fluid to cover the ornaments on the Christmas tree.
You can create fun shapes like circles, diamonds, and stars. I think using a variety of sizes makes it look even cuter.
Once that’s done, we can paint the Christmas tree freely without worrying about protecting the decorations.
Step 2: Christmas Tree
You can choose your favorite color palette. Initially, I planned to use a blue-green tone, but I think blue or blue-violet would also look beautiful.
I used Ultramarine and then blended it with Phthalo Green + Ultramarine to create a blue-green tone.
As you paint from top to bottom, gradually extend the brushstrokes. Pay attention to how the branches vary in position: some droop downward, some extend upward, and others are horizontal. The key is to create an overlapping effect for a natural look.
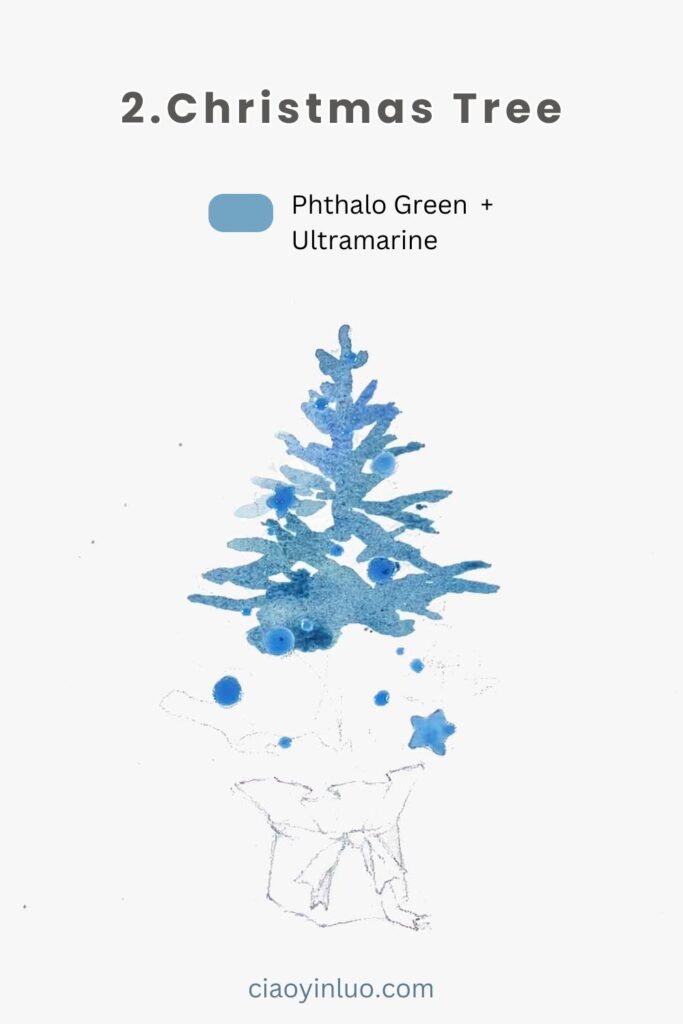
Finally, while the base color is still wet, I blend in some dark blue Indigo, focusing on the bottom of the Christmas tree.

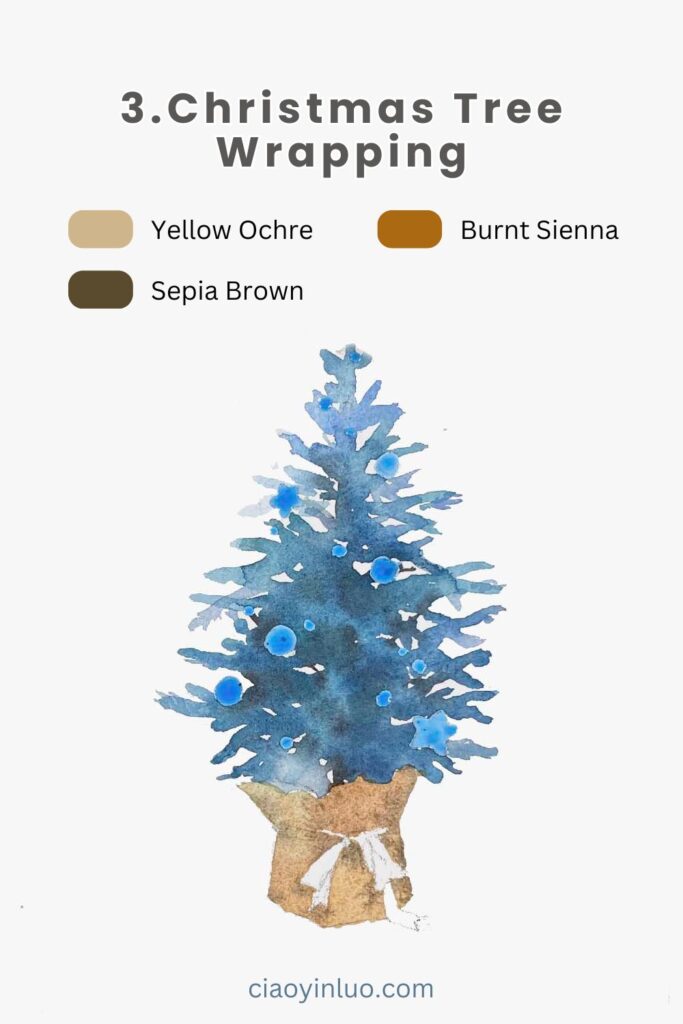
Step 3: Christmas Tree Wrapping
For the tree’s wrapping, I use Yellow Ochre and Burnt Sienna to cover the main areas, then add Sepia to create shadows, especially under the decorative ribbons. After that, let it dry.
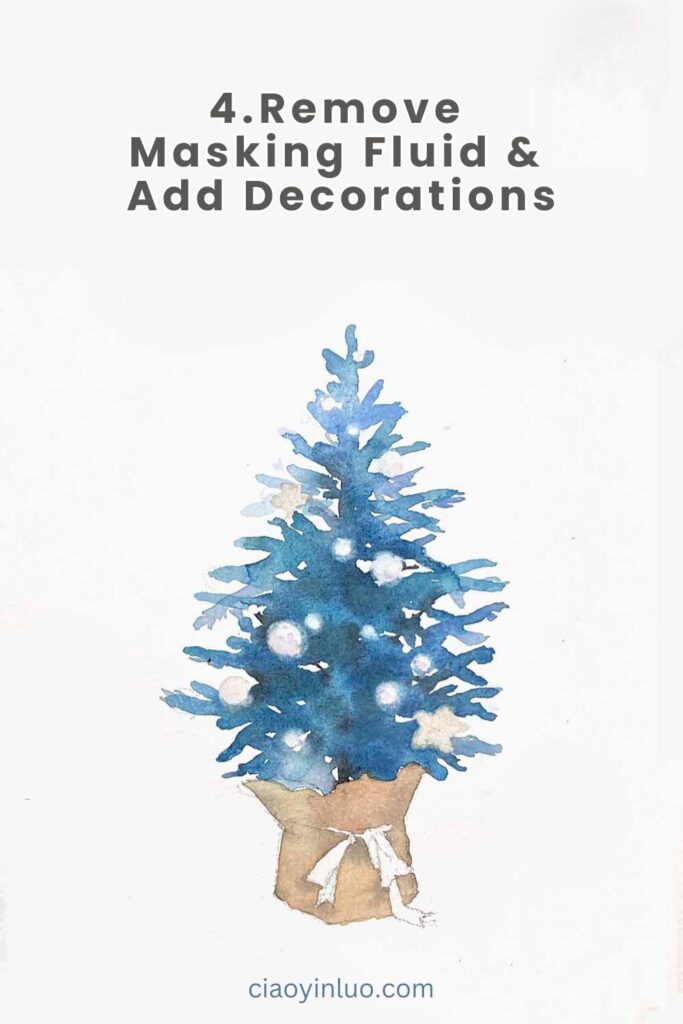
Step 4: Remove Masking Fluid &Add Decorations
Next, we can remove the masking fluid using rubber or an eraser. You’ll reveal the decorative patterns, but their edges may be quite sharp. To soften them, use a slightly damp watercolor brush to soften the edges, creating a glowing effect! However, you don’t need to do this for every shape—just a few for variety.
I also added a touch of color to some ornaments, such as light yellow and soft pink.
Step 5: Add Details
For the final steps, we’ll add a few more beautiful details.
Draw brown hanging strings for the ornaments on the white background. For the ornaments inside the tree, use a lifting technique to create thin lines for the strings.
I decided to keep the colors simple, so I didn’t emphasize the ribbon on the packaging. Instead, I applied a light Ochre Yellow and added simple brushstrokes to create subtle folds.

And we’re done!
I hope you enjoyed this Christmas tree illustration.
Thank you so much for finding and trying out this tutorial. I hope it was helpful and brought you joy in using watercolors!
Feel free to share your results in the comments below—I’d love to see how your Christmas tree illustration turned out. If you have any suggestions for what I should paint next, let me know!
See you in the next lesson!
Related Blog Posts:
Watercolor Tutorial: Snowy Mountain Landscape – Perfect for Beginners
How to paint Forget-me-not flower: Step-by-Step Easy watercolor Tutorial
