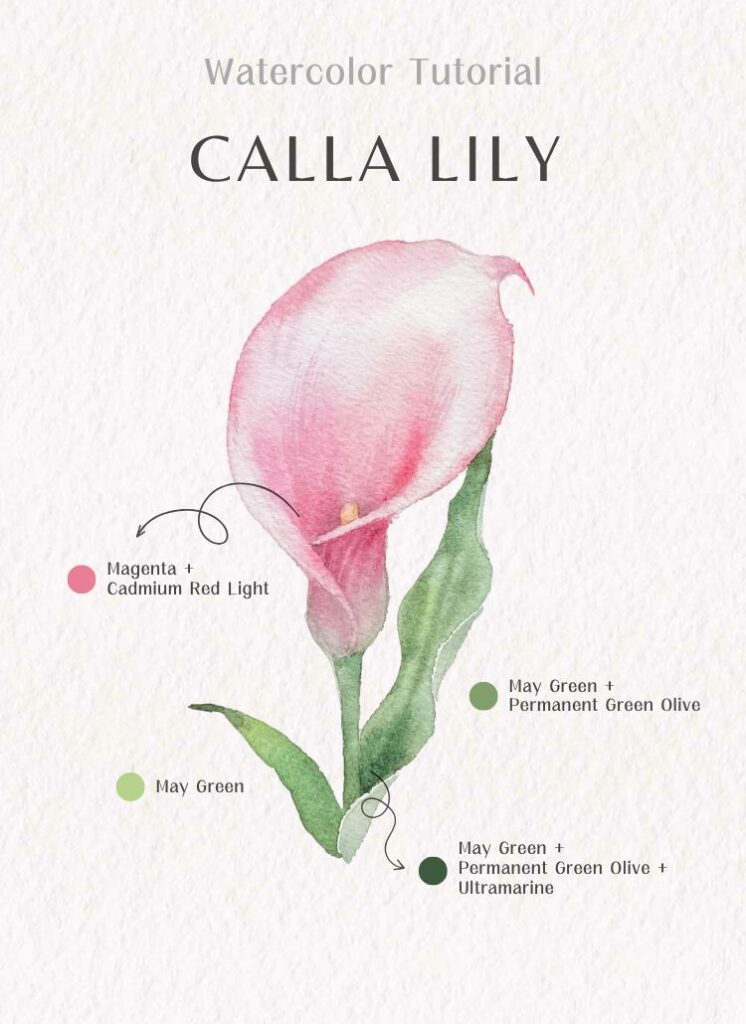
Do You Love the Elegant Lines and Simple Shape of the Calla Lily?
While white Calla Lilies are the most common, I find that pink, purple, and even black varieties have their own unique charm.
In this tutorial, I’ll show you step by step how to paint a soft pink Calla Lily, using color blending, watercolor washes, and simple details to make it look natural and realistic.
Painting Tools
- Watercolor Paper: Arches Cold-Pressed Watercolor Paper
- Brushes: Escoda Perla #8 / Escoda Versatil #10
- Watercolors: For this beginner step-by-step watercolor tutorial series, I use Schmincke Horadam 24 Half-Pan Set. You can choose any brand and find similar colors.
Colors:
Magenta
Cadmium Red Light
May Green
Permanent Green Olive
Ultramarine
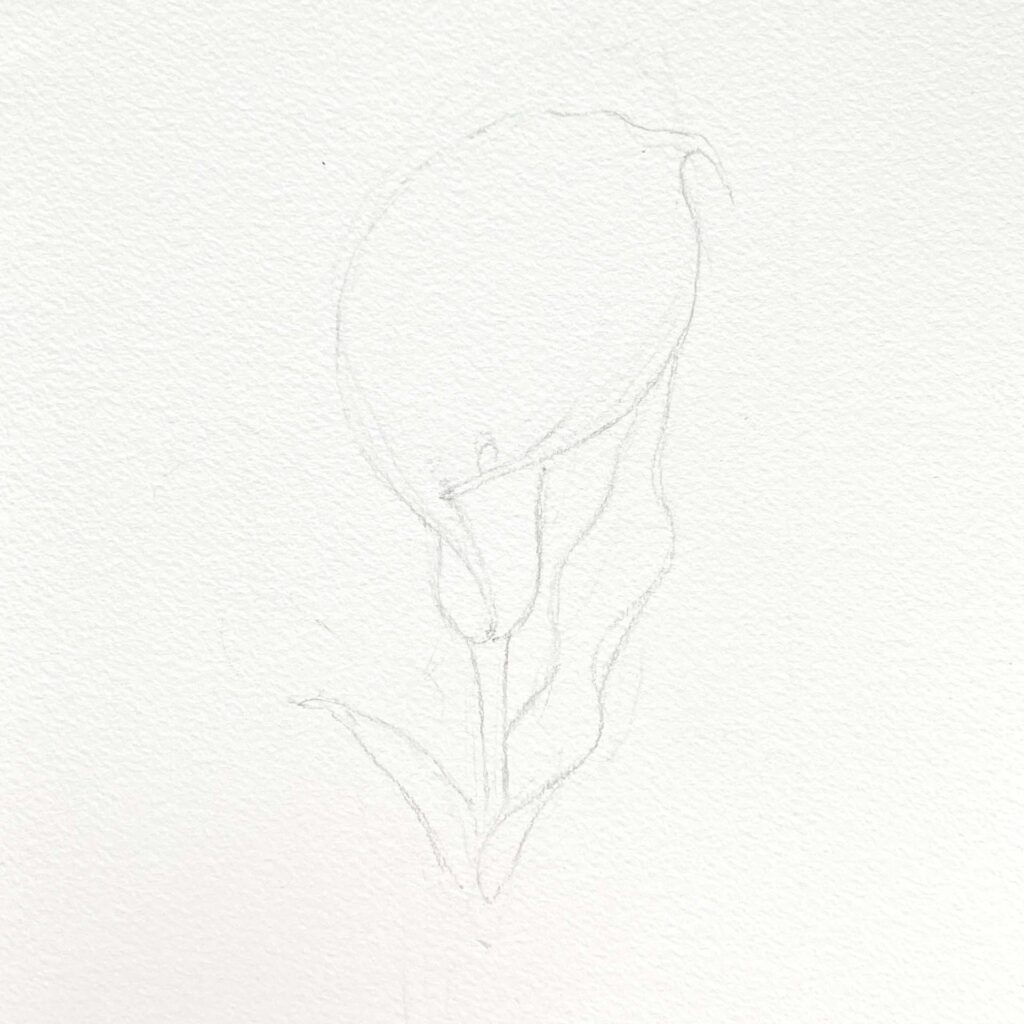
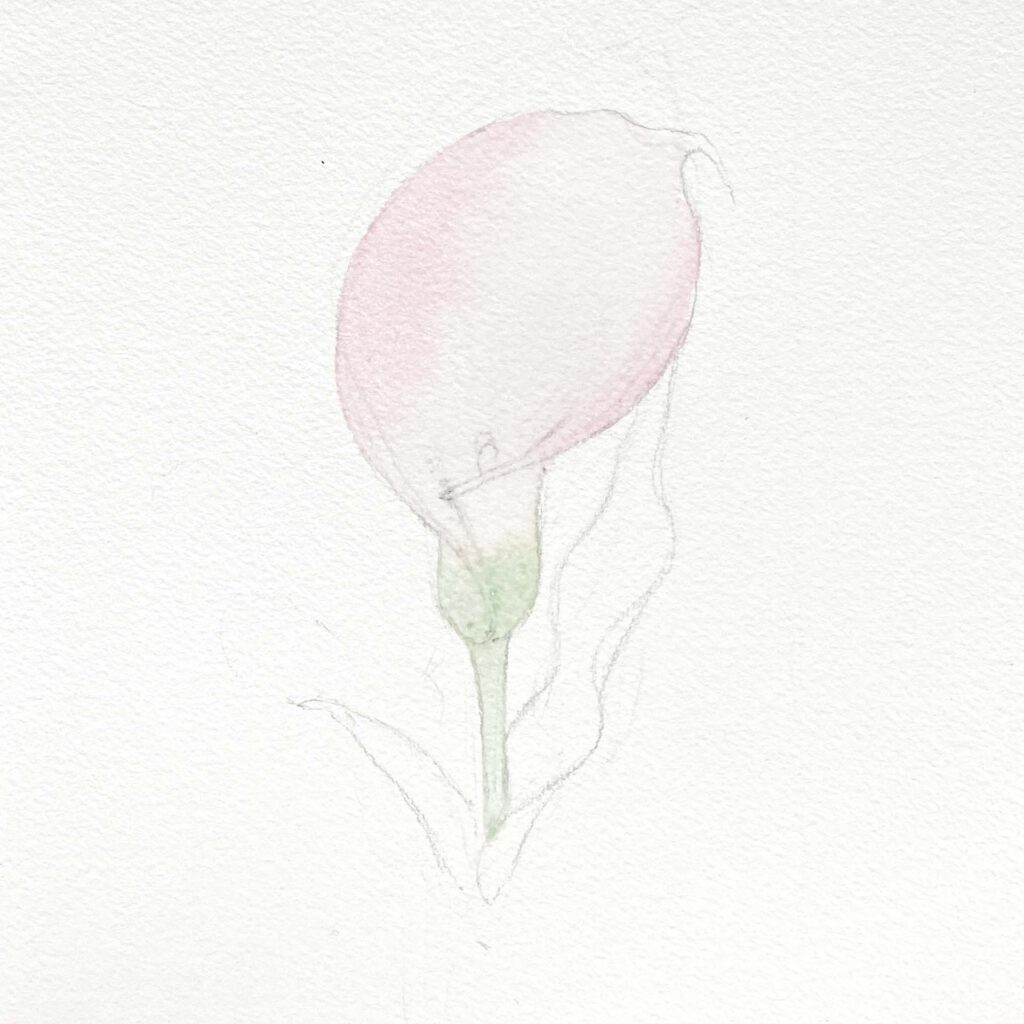
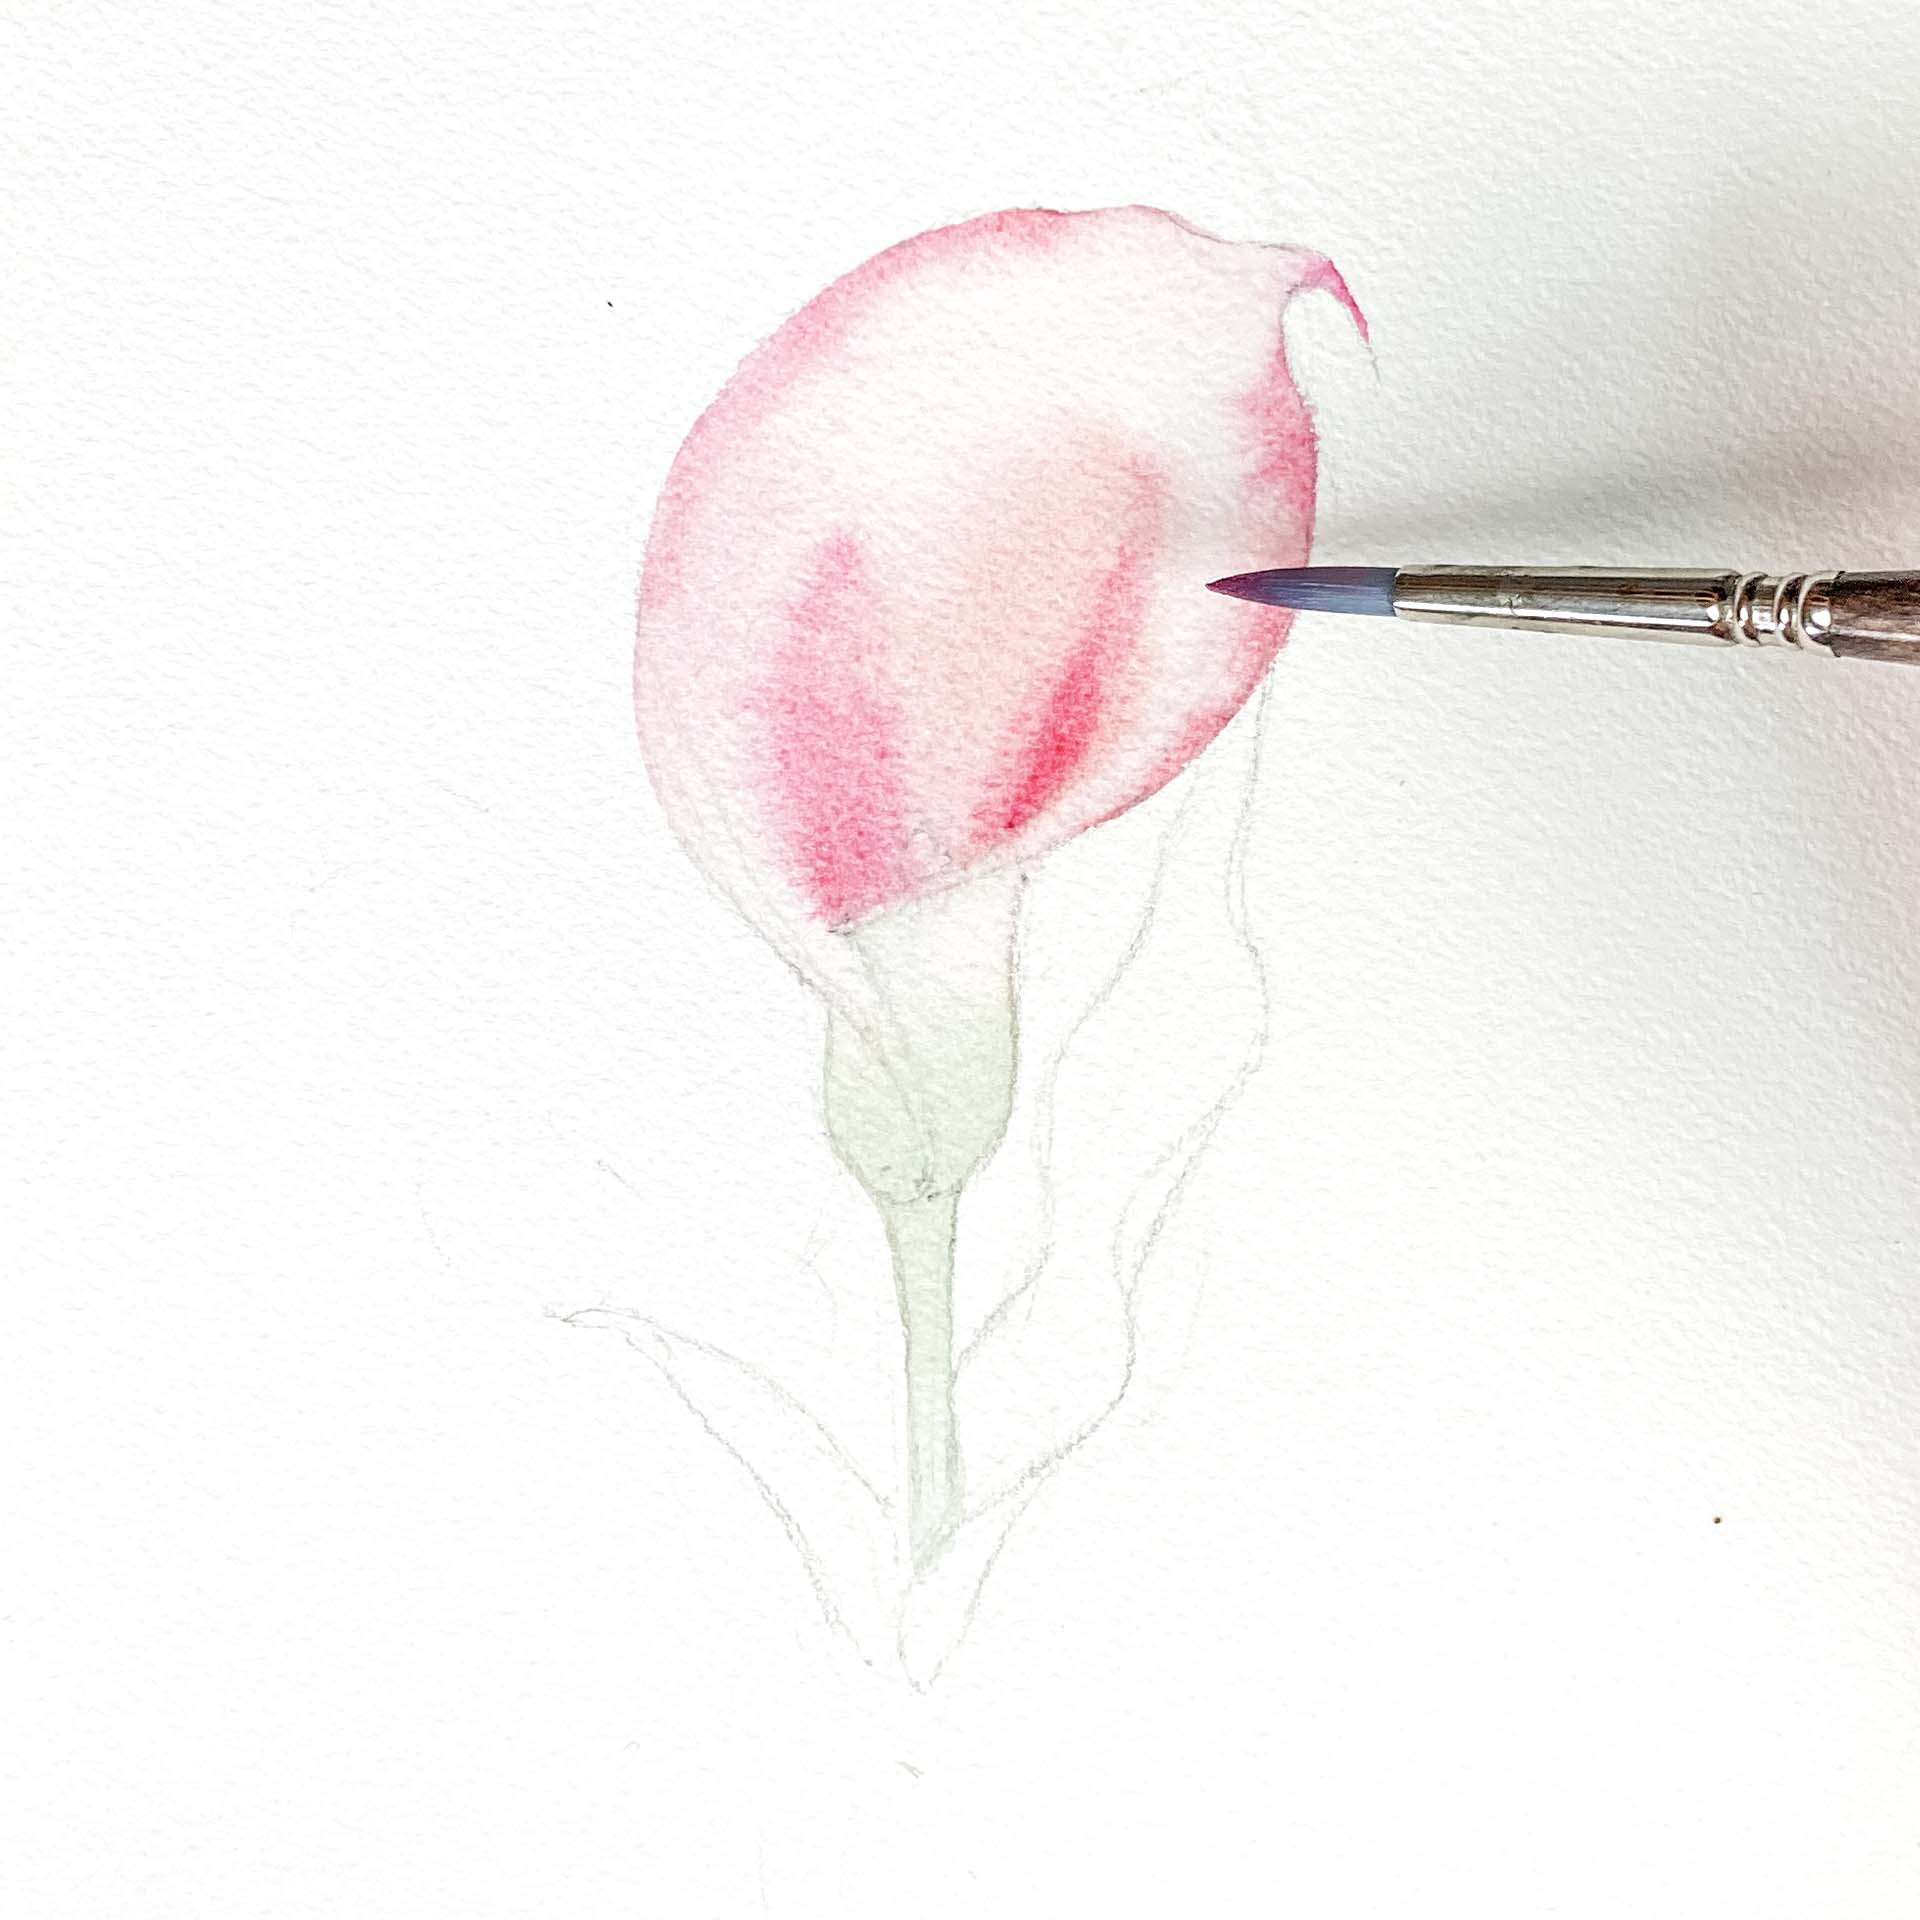
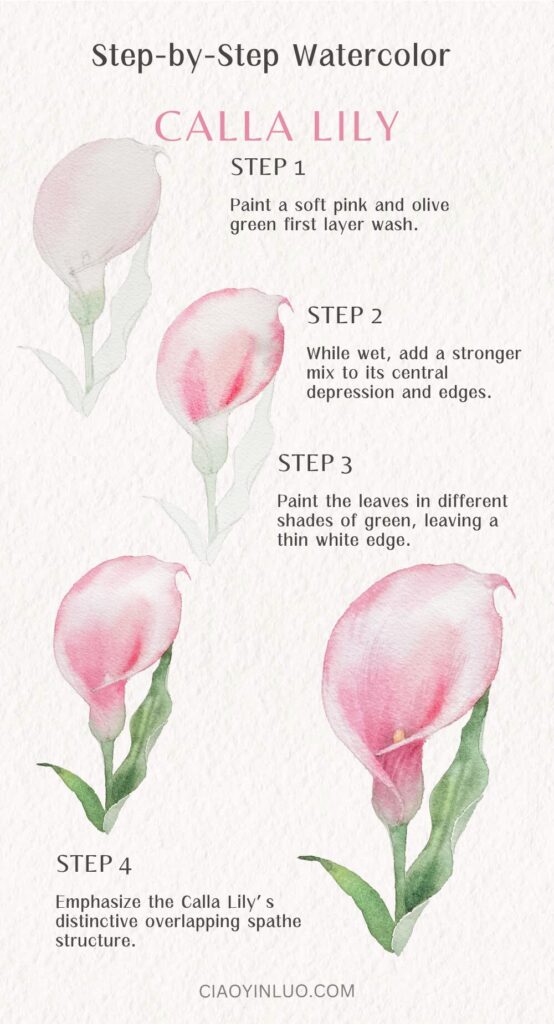
1. First Wash
Let’s start by painting the Calla Lily with a soft pink base.
Since I prefer a warmer pink tone, I mix Magenta with a touch of Cadmium Red Light to create a warm peachy pink.
Beginning from the top, apply the pink shade and gradually blend it downward into Permanent Green Olive, completing the first layer wash.
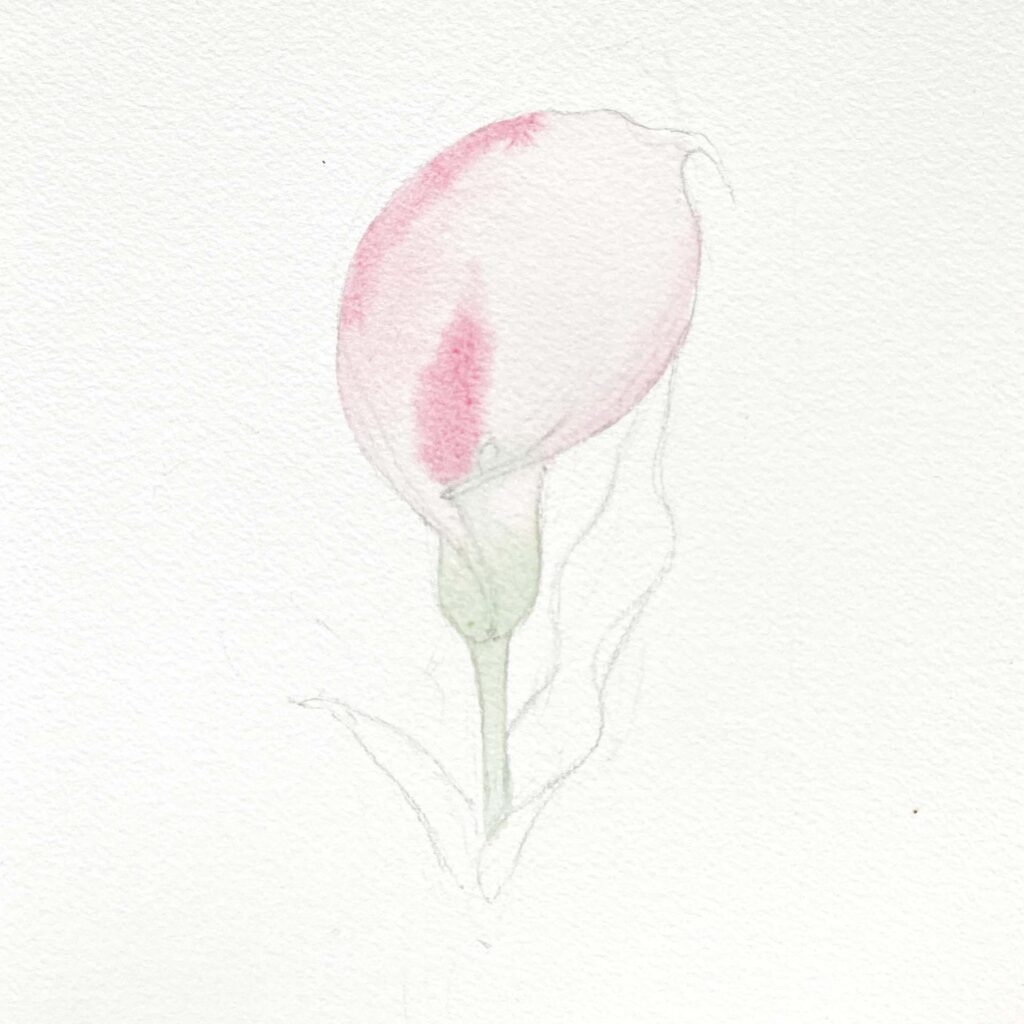
2. Adding Texture and Gloss to the Spathe
While the base layer is still wet, let’s enhance the petal-like texture of the Spathe (though technically, it’s not a petal!).
If the first wash has already dried, don’t worry—simply apply a thin layer of clean water over the flower before proceeding.
Now, take a slightly stronger mix of Magenta and Cadmium Red Light and add it to the central depression and edges of the Spathe.
This helps highlight the illuminated areas, creating the signature trumpet shape of the Calla Lily.
Once dry, add another layer to the base of the flower—do you see the thickness of the Spathe now?
Let’s pause here and move on to painting the leaves before coming back to add finer details.
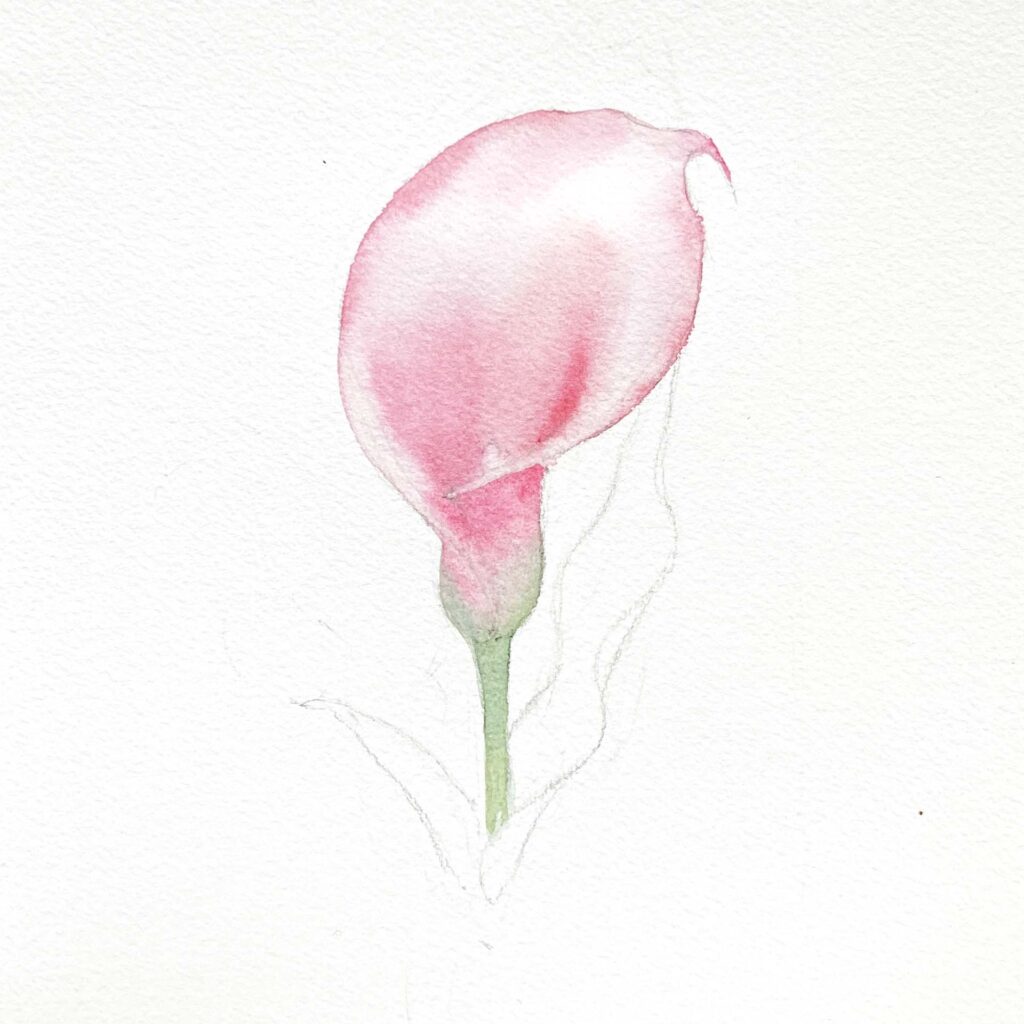
3. Painting the Leaves
For the leaves, I primarily use a mix of May Green and Permanent Green Olive to paint the main body of the leaf, making sure to leave the right side’s underside unpainted.
Next, mix a small amount of Ultramarine with Permanent Green Olive to create a deeper green, then apply it to the leaf tips and base. You can also add a few leaf veins.
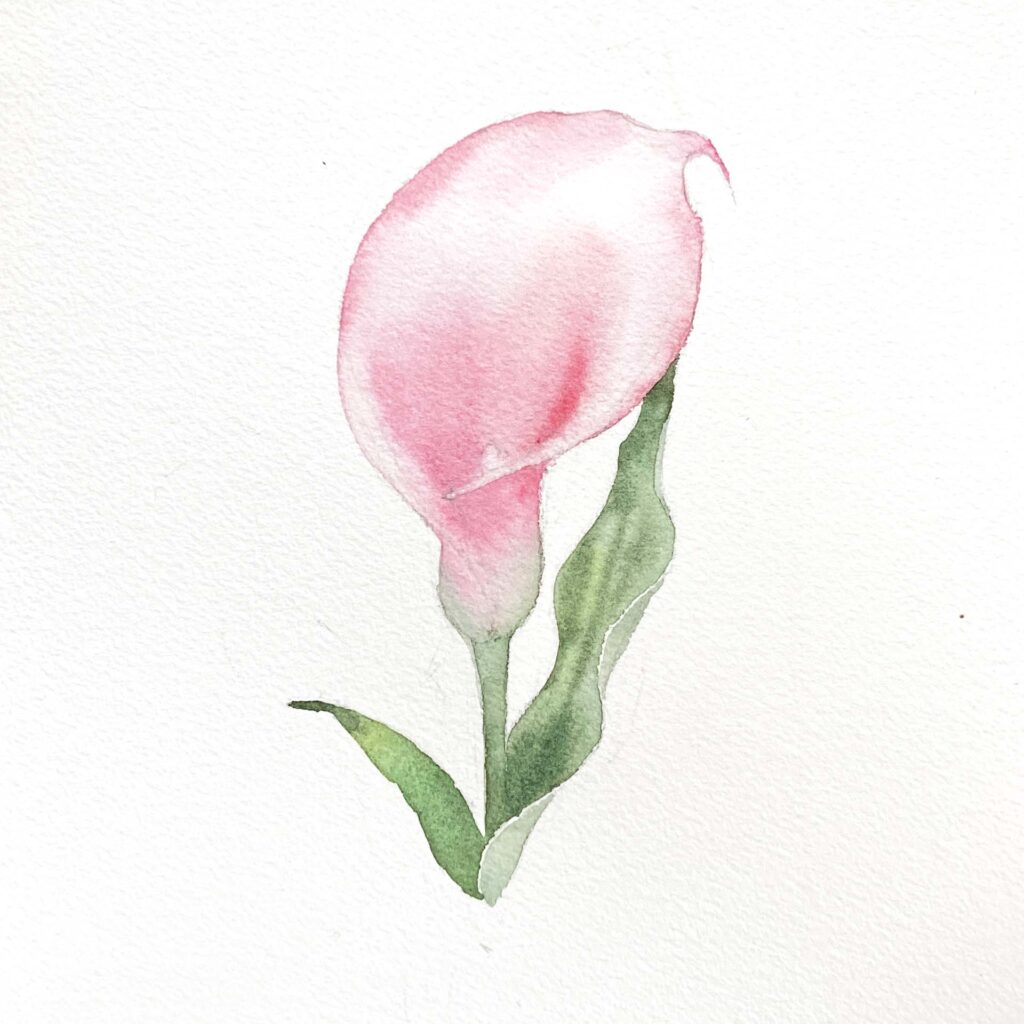
Once dry, paint the underside of the leaf, leaving a thin white edge to indicate its thickness. With this, the leaves are complete!
4. Final Details
We’re almost done!
The final key steps are to enhance the contrast and refine the details.
First, deepen the cup-like part of the flower to emphasize Calla Lily’s distinctive overlapping Spathe structure.
Once this section dries, use a small brush to gently lift some pigment and create some lines.
I personally prefer to keep these lines minimal and suggestive rather than overly prominent.

Don’t forget the Spadix! Paint it yellow—I’m using Chromium Orange Hue.
To make the Spadix stand out, mix the pink flower color with a touch of Permanent Green Olive to create a muted pink and apply it around the Spadix. This contrast will give it a more three-dimensional look.
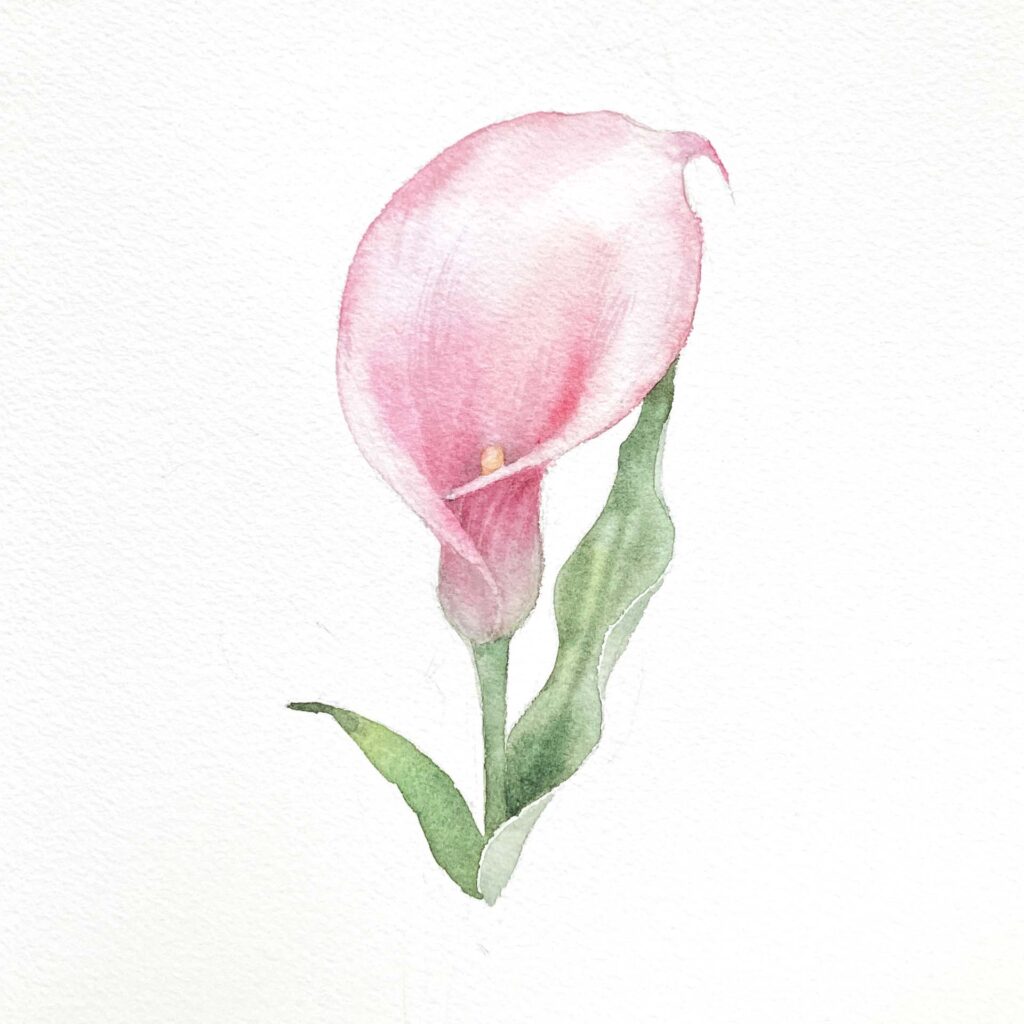
Finally, using the tip of your brush, add fine strokes along the curvature of the Spathe for extra texture.
And that’s it—our soft pink Calla Lily is complete!
I hope this tutorial helps you become more comfortable with watercolor washes, layering techniques, and detail refinement. Try applying these techniques to create more beautiful floral paintings!
I find that Calla Lilies look stunning from every angle and would make an excellent subject for a full series of artworks.
If you have any questions or would like to share your work, feel free to leave a comment—I’d love to see your creations!
Related Blog Posts:
Learn how to paint watercolor Himalayan blue poppy
Lean how to paint watercolor Pansies
Learn how to paint Catharanthus roseus with watercolor