Is the city you live in already filled with the feeling of autumn? 🍂
In Taiwan, the change of seasons isn’t very distinct, but here in central Spain, everything is now covered in warm golden, orange, and red tones.
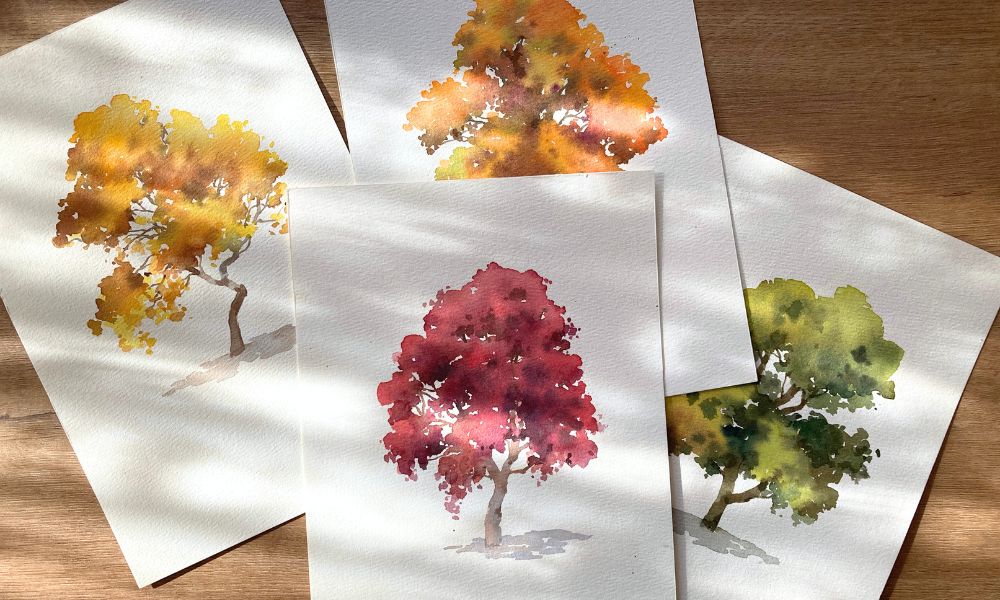
Earlier this year, I shared a step-by-step tutorial on how to paint trees, and it received a lot of love — so this time, let’s paint an autumn-colored tree together!
Painting Tools
- Watercolor Paper: Arches Cold-Pressed Watercolor Paper
- Brushes: Escoda Perla #8 / Escoda Versatil #10
- Watercolors: For this beginner step-by-step watercolor tutorial series, I use Schmincke Horadam 24 Half-Pan Set. You can choose any brand and find similar colors.
Small Note
I’d like to share two small notes:
First, I use quite a few colors in this painting. You can absolutely simplify your palette and still create beautiful results.
The colors I recorded are simply the ones I naturally reach for without thinking — for example, I might use two shades of orange or two greens, but you could easily reduce that to just one of each.
Second, when painting trees from light to dark, I usually don’t completely rinse out my brush between layers. For example, when painting a golden-yellow tree, I start with lemon yellow, then add orange tones — but I don’t fully wash away the yellow unless I’m switching between very different hues, like from purple to green.
1. Green Tree
Colors:
Cadmium Yellow Light
Chrome Yellow Deep
Chromium Orange Hue
Burnt Sienna
Sepia Brown
May Green
Permanent Green Olive
Ultramarine Finest
We can use a size 10 watercolor brush.
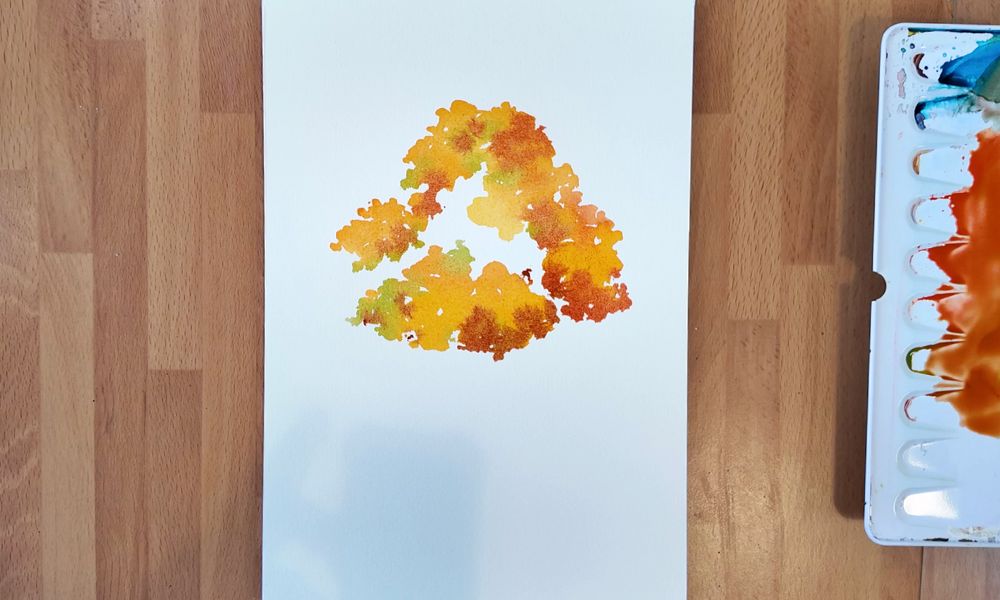
Let’s start with Cadmium Yellow Light or Chrome Yellow Deep as the main color, and mix in a bit of May Green.
We paint soft, cloud-like clusters to form the main body of the tree. By adjusting the balance between yellow and green, we can make the tones feel richer and more natural.
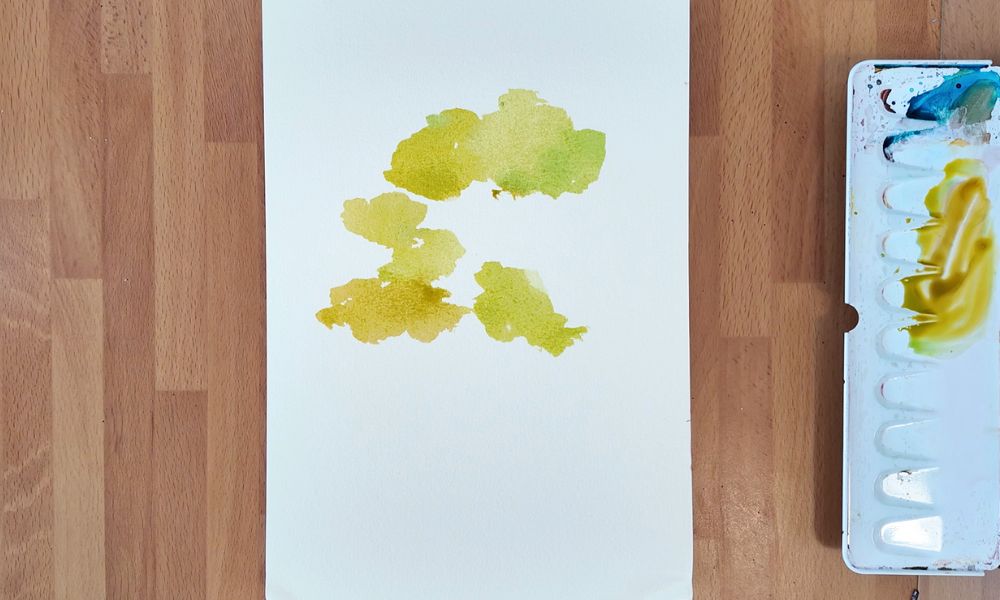
No need to rinse the yellow from the brush. We use it to add depth to the foliage.
Let’s mix in some Cobalt Green Dark, or try Ultramarine Finest with Burnt Sienna, to create interesting shades of green.
Then we add these colors to parts of the tree, letting them flow naturally on the paper.

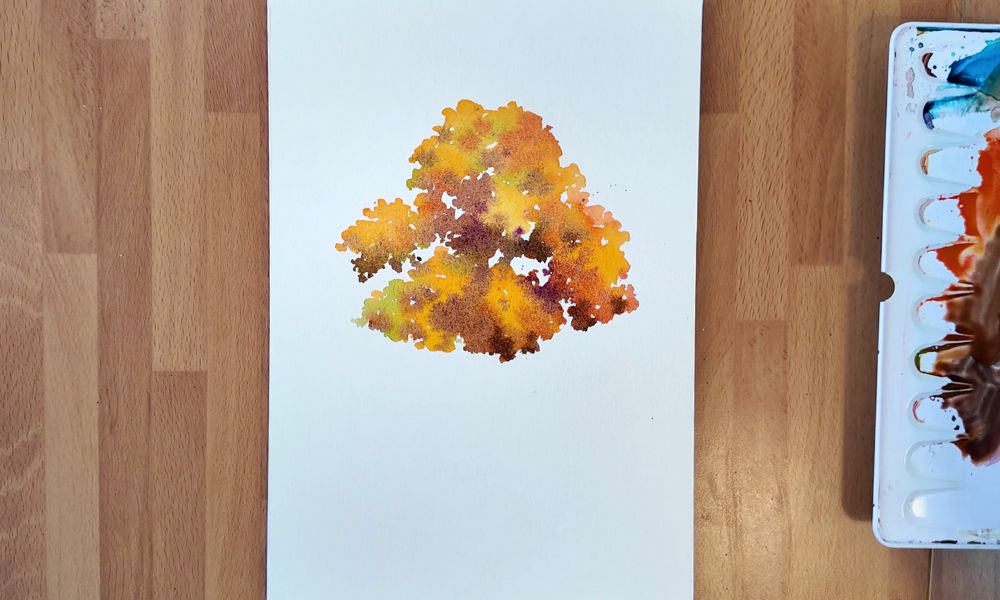
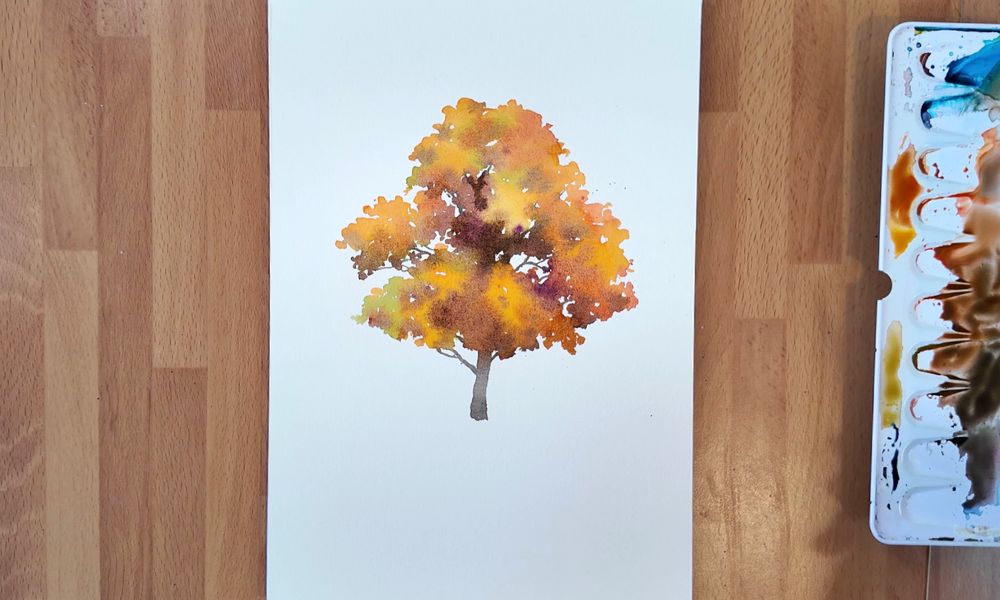
Next, we switch to a smaller size 8 brush to paint the branches and trunk, using Cobalt Green Dark with a touch of Sepia Brown.
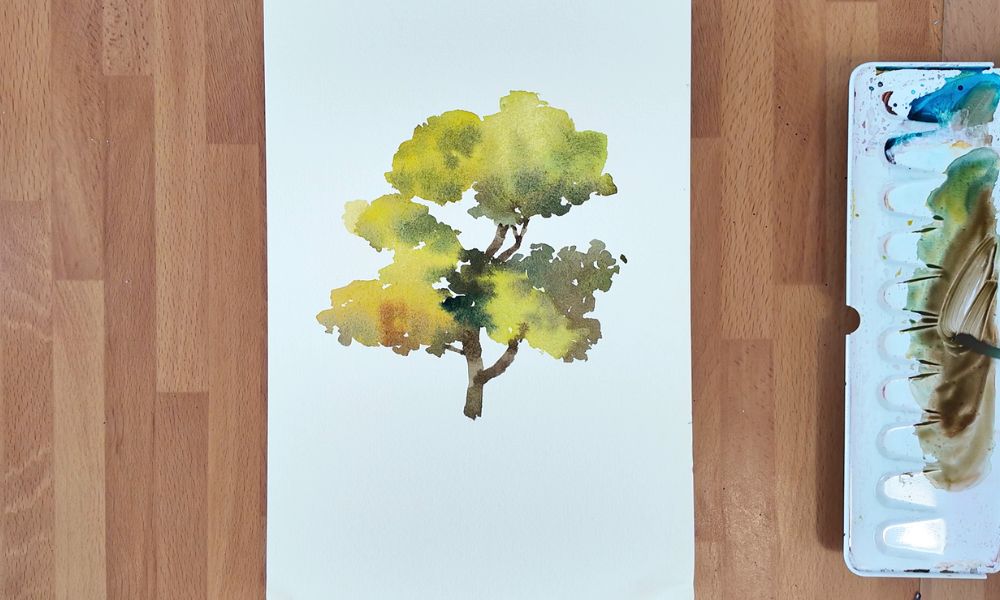
We add a few small strokes or dots in the shaded parts of the foliage to create contrast and highlight the front leaves.

When the first layer dries, we add a bit more foliage behind the main shape to give the tree more depth.
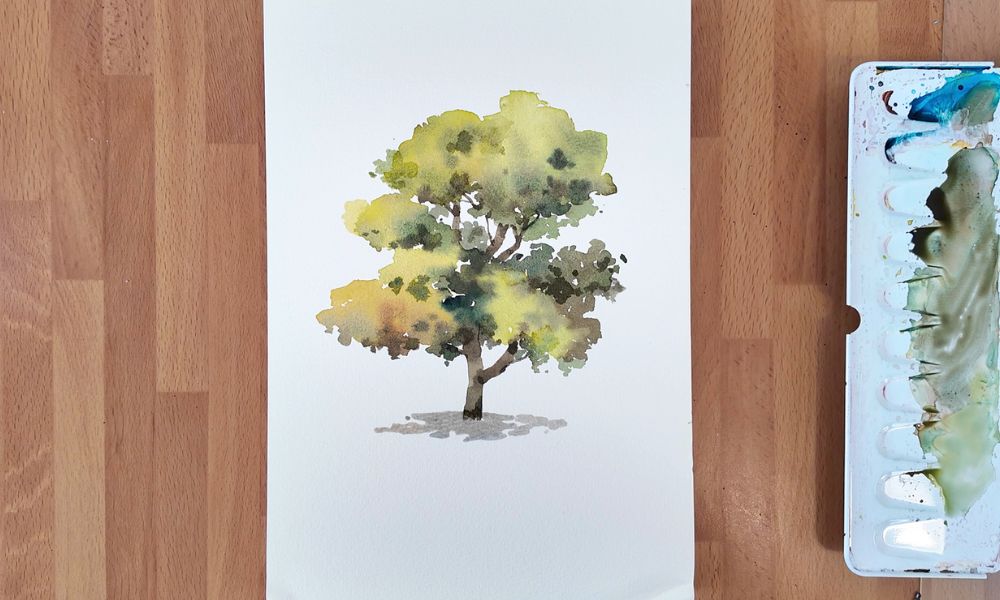
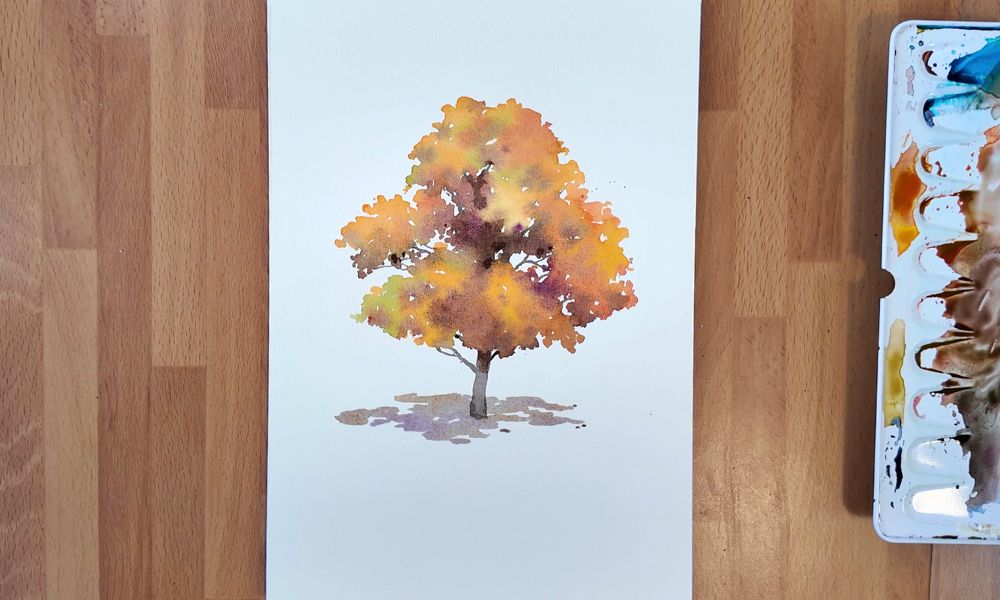
Finally, we mix Ultramarine Finest and Sepia Brown to create a soft grayish-brown tone, and use horizontal strokes to paint the shadow under the tree.(The same shadow technique works for all the other trees as well.)
And now, our green-toned tree is complete!
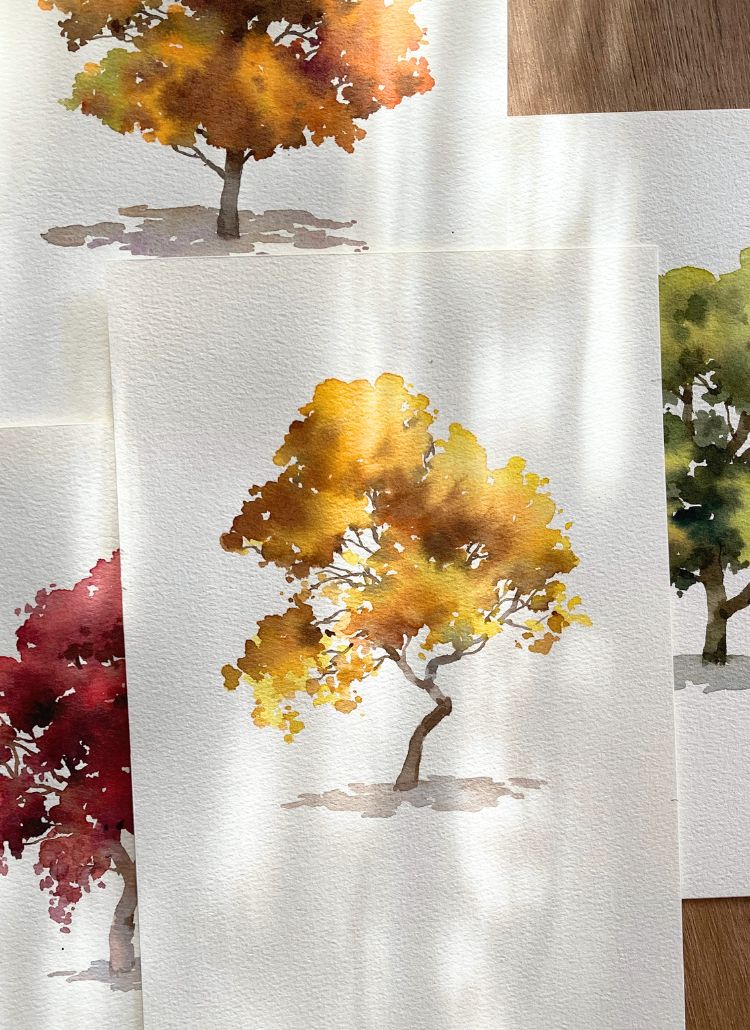
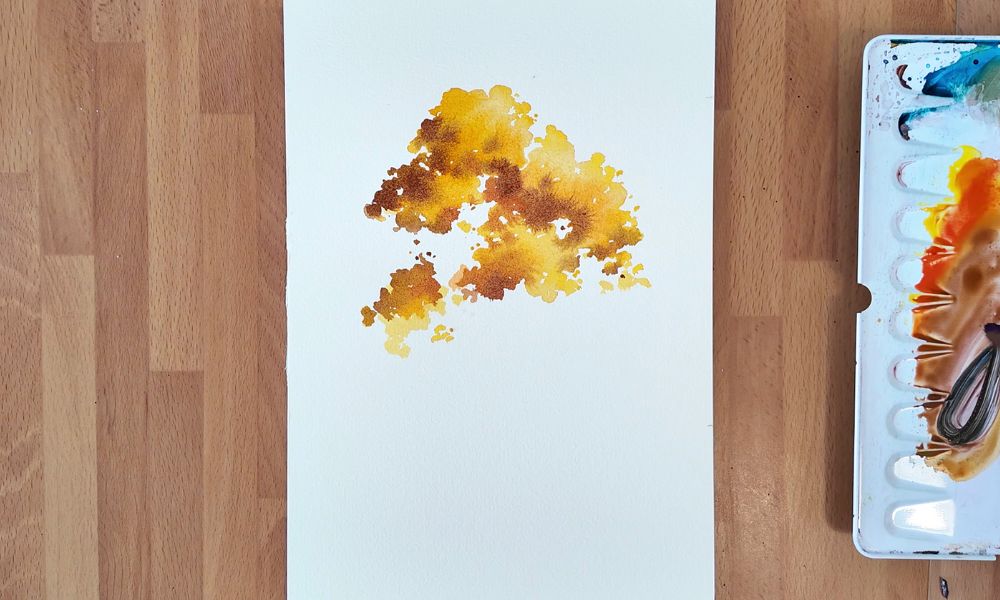
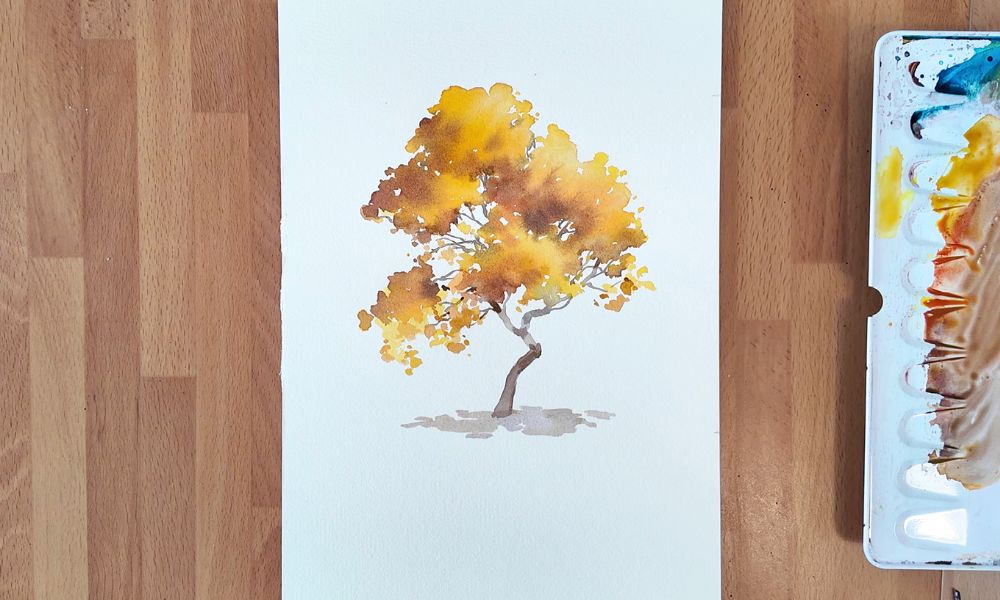
2. Yellow Tree
Colors:
Chrome Yellow Deep
Chromium Orange Hue
Burnt Sienna
Sepia Brown
May Green
Permanent Green Olive
Ultramarine Finest
This might be my favorite one in this series! Golden trees always bring a sense of joy.
We start again with a size 10 brush, mixing Lemon Yellow and Cadmium Yellow Light to shape the foliage.
Then we blend in Chrome Yellow Deep to deepen the shaded areas.

Now for the vibrant contrast!
Before the yellow dries, we add touches of Cadmium Red Light, and a mix of Chrome Yellow Deep + Burnt Sienna + Indigo in the darker parts.
Even a little bit of green works beautifully — we let the colors melt naturally together.
Next, we switch to a smaller brush and paint a curved trunk using Ultramarine Finest mixed with Burnt Sienna, then add fine branches.
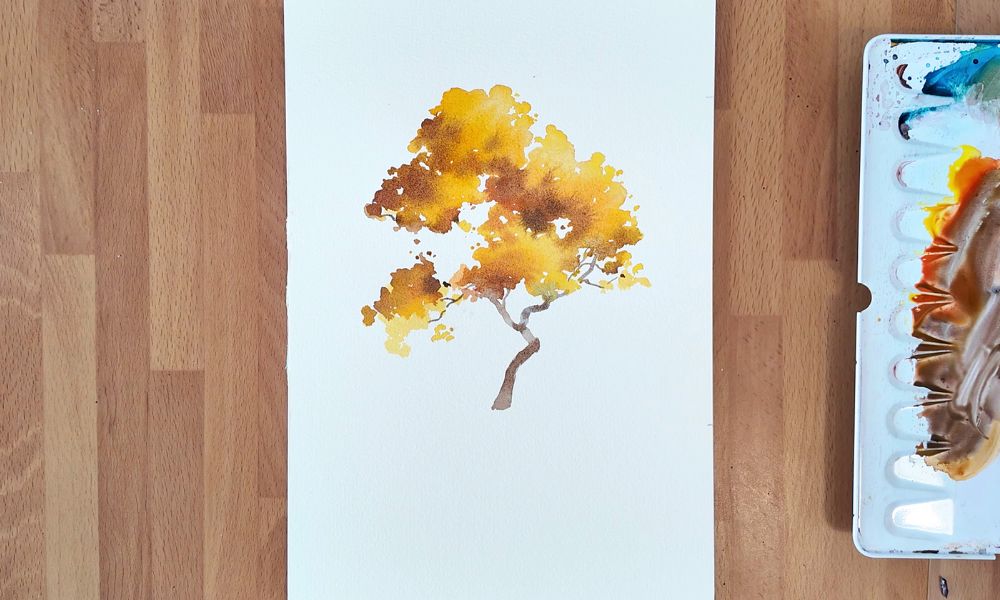
Now, once the branches are done, we use both light and dark yellow tones to dot some leaves near them.
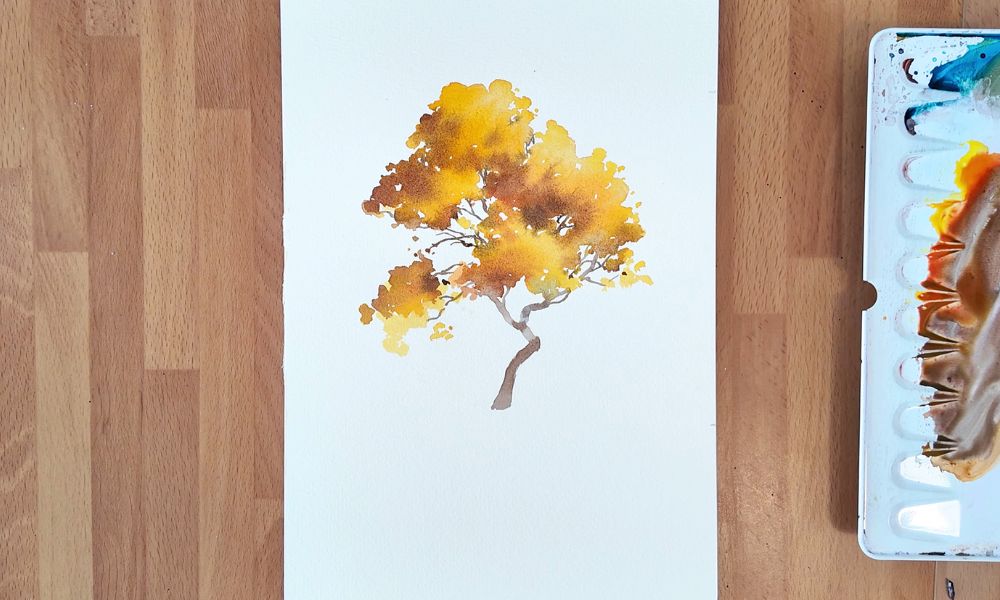
Finally, we paint a soft gray shadow under the tree.
Do you like this golden-yellow tree as much as I do?
3. Orange Tree
Colors:
Chrome Yellow Deep
Chromium Orange Hue
Burnt Sienna
Sepia Brown
May Green
Permanent Green Olive
Ultramarine Finest
This orange tree may be the most color-rich one in the whole series — from yellow and orange to green, brown, and even purple.
Let’s begin!
This time, we don’t start with lemon yellow.
We start with a warm base. This is Cadmium Yellow Light mixed with Chrome Yellow Deep. Then, add a touch of orange. Use Chrome Yellow Deep and Chromium Orange Hue for this. Apply it at the base of each cluster.
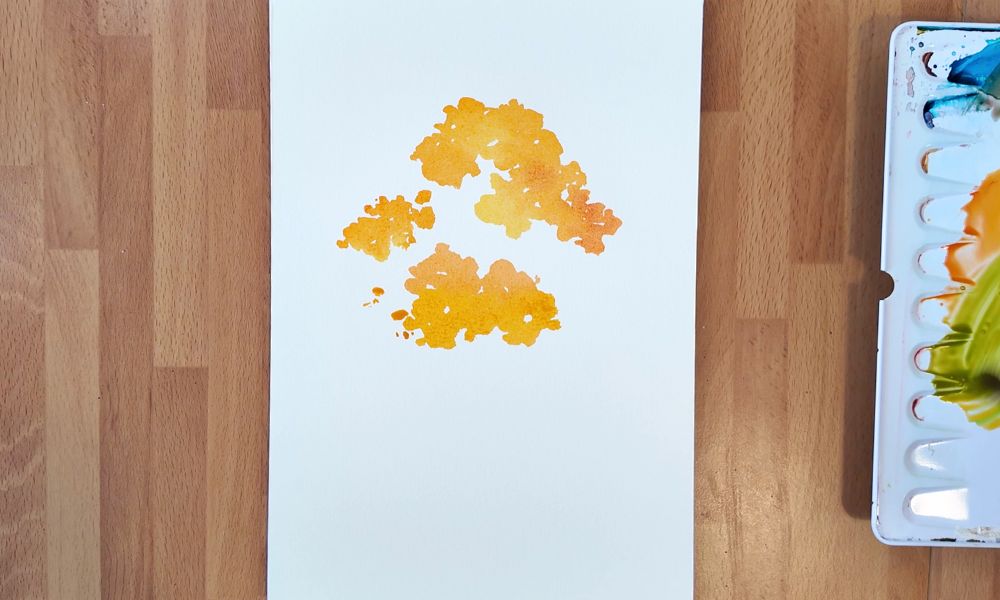
Next, we blend in a bit of green using Cadmium Yellow Light with May Green or Permanent Green Olive.
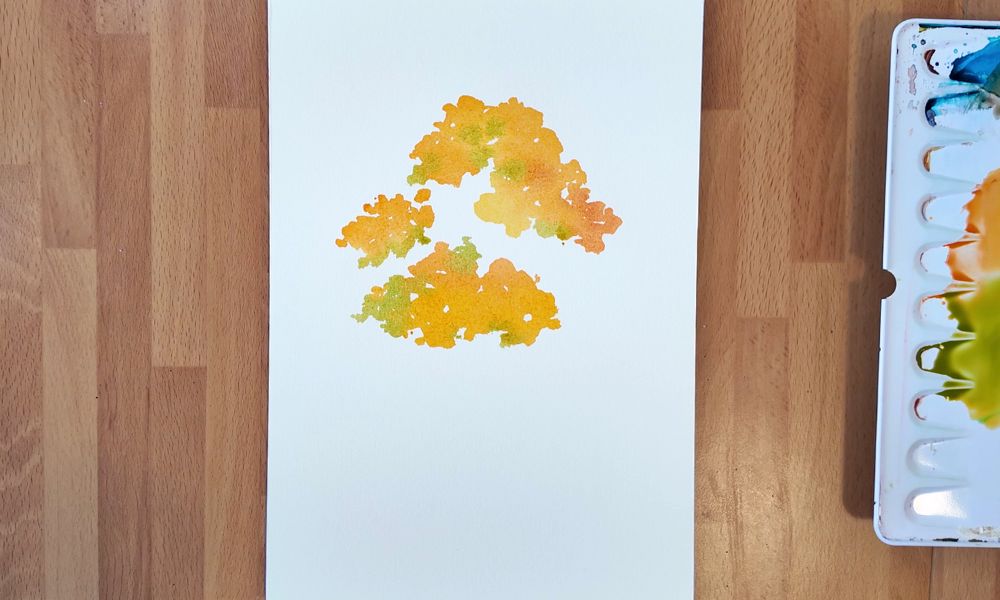
Now let’s bring in more warmth — we add Cadmium Red Light and Burnt Sienna to certain areas.
We don’t need to rinse the brush between these colors. They blend beautifully and stay harmonious.
Next, we add the shadows.
We mix Manganese Violet with Sepia Brown to create a deep purplish-brown tone, painting it at the base of the foliage and the inner sides near the trunk.
At this stage, the orange layer isn’t completely dry but no longer too wet, so the darker tones blend slightly without spreading too much.
Don’t forget to add the tree trunk and some fine branches among the foliage.
Finally, we paint the shadow.
Besides using Ultramarine Finest and Sepia Brown, we can also add a hint of Manganese Violet to echo the darker tones of the tree.
And there we have it — a tree glowing with the warmth of autumn, perhaps capturing one of the most poetic moments of the season.
4. Red Tree
Colors:
Chrome Yellow Deep
Chromium Orange Hue
Burnt Sienna
Sepia Brown
May Green
Permanent Green Olive
Ultramarine Finest
The fiery red tree always catches our eyes first — it feels like a flame in the forest.
This one has a simpler color palette.
We start with Cadmium Red Light and Permanent Carmine to shape the main body of the tree.
Then we add a touch of Manganese Violet in certain areas for depth.
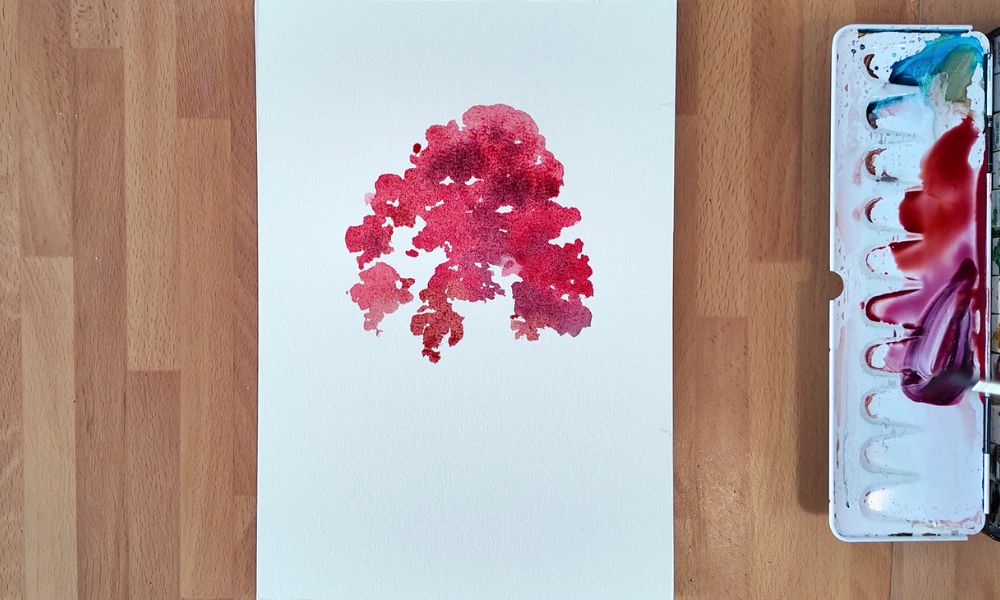
Next, we mix Permanent Carmine + Manganese Violet + Indigo to create a deep blue-purple shade, and add it to the lower parts of the foliage.
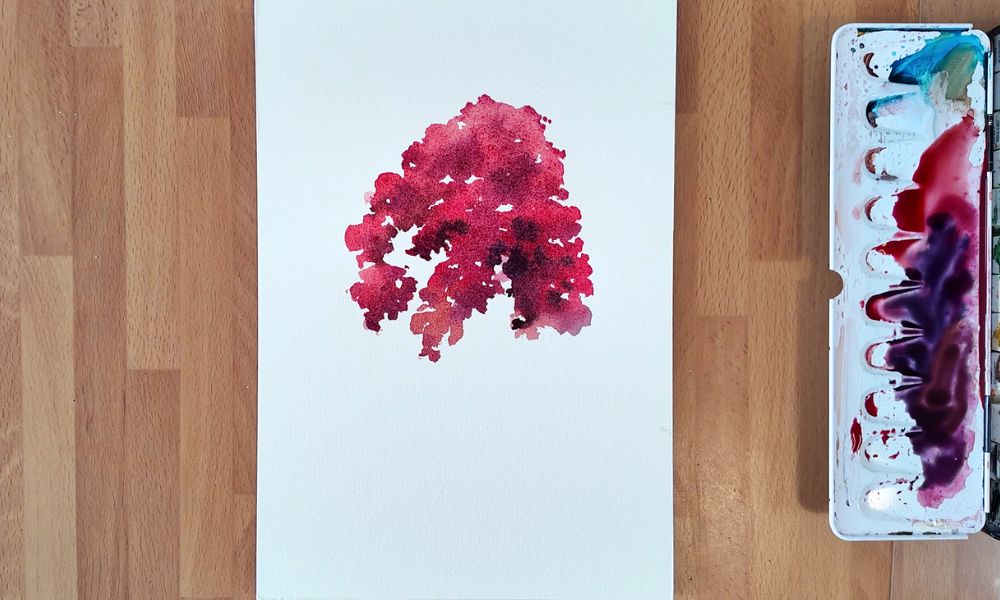
We dilute a mix of Manganese Violet + Burnt Sienna + Indigo to paint the trunk and branches, giving them a gray tone with a subtle red-violet tint.
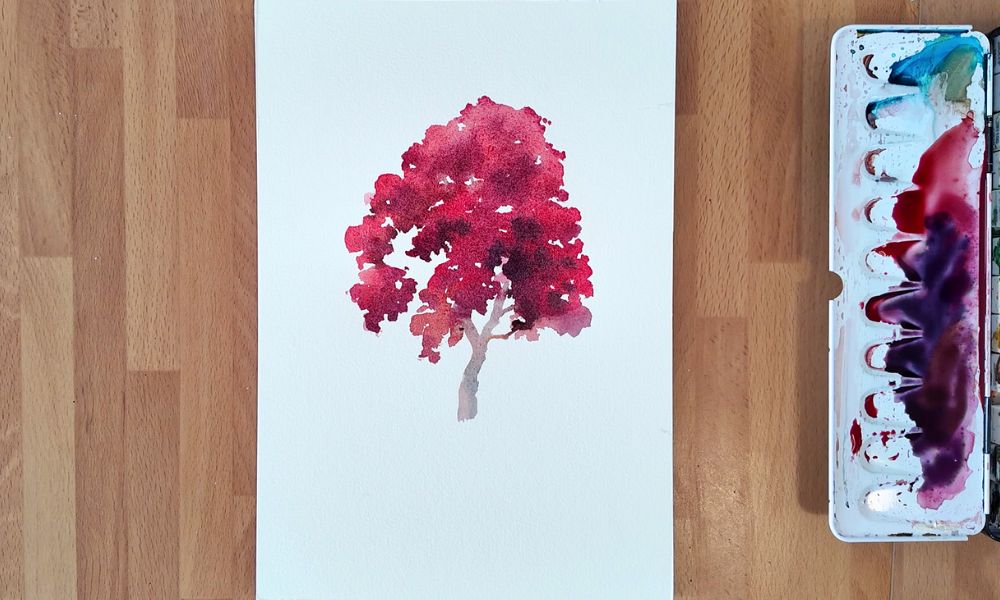
Let’s add a few details — more fine branches, and a few scattered leaves along the edges and bottom of the foliage, to make the tree look more delicate and graceful.
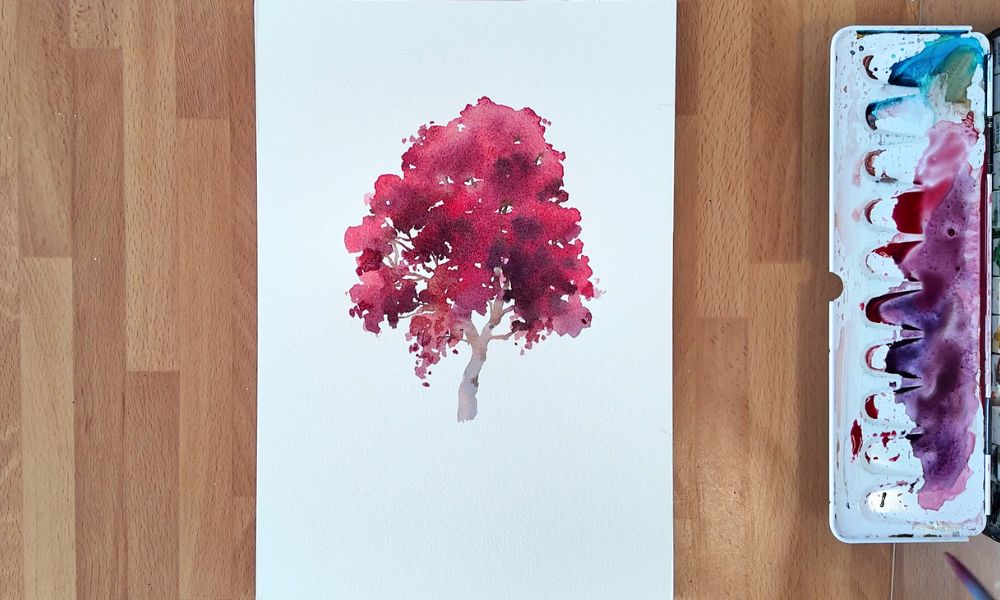
Finally, we use a diluted mix of Ultramarine Finest + Sepia Brown to paint the shadow.
Since the tree leans slightly, we place the shadow toward the right side — it gives the painting a better balance.
And just like that, our red autumn tree is complete.

From bright yellow to deep red, each shade quietly reminds us how time moves and life changes.
When we paint autumn trees, we don’t need to chase perfect shapes. Instead, we let the colors merge freely and breathe on the paper.
I hope this step-by-step guide inspires you to create something meaningful and beautiful this fall.
If you enjoyed this tutorial, don’t forget to save this image to your Pinterest board for later!

Related Blog Posts:
Learn how to paint watercolor Autumn Leaf
Learn how to paint watercolor Maple Leaf
Learn how to paint watercolor Mushroom