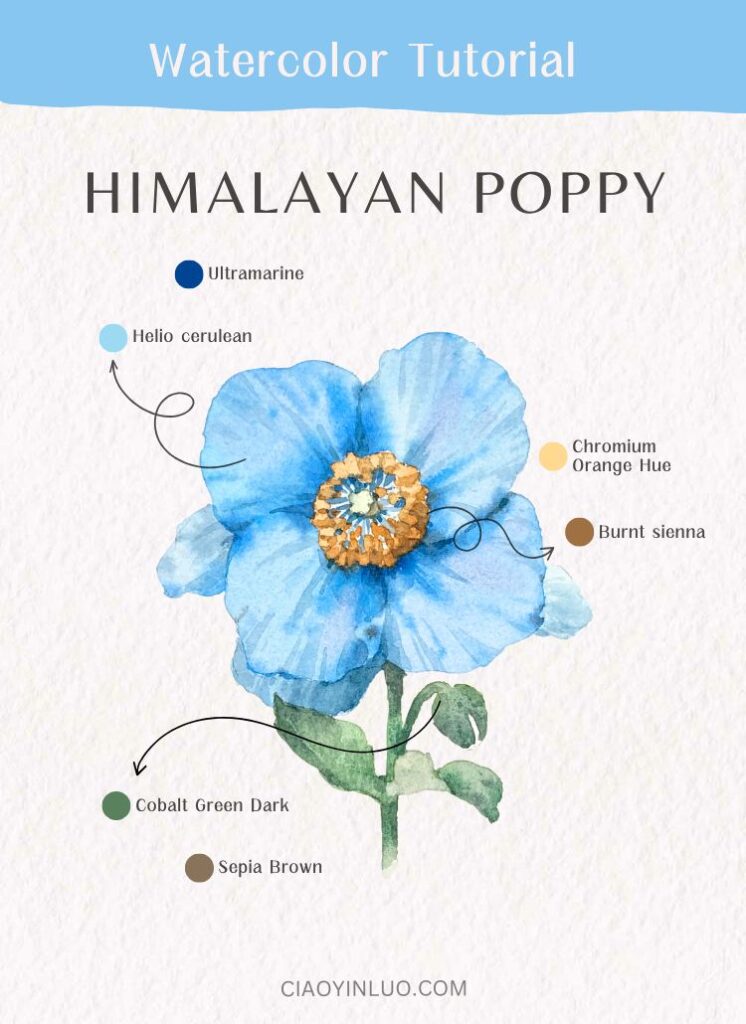
The first time I saw the Himalayan blue poppy, I was stunned by its color.
Typically, the blue flowers I’m familiar with are composed of many small blossoms, like hyacinths or hydrangeas. However, the Himalayan blue poppy, with its large, slightly translucent pale blue petals and bright orange-yellow stamens, truly caught my eye.
In this article, I will share a step-by-step process for painting the Himalayan blue poppy in watercolor, from mixing beautiful blue tones to creating the details that bring the flower to life.
Painting Tools
- Watercolor Paper: Arches Cold-Pressed Watercolor Paper
- Brushes: Escoda Perla #8 / Escoda Versatil #10
- Watercolors: For this beginner step-by-step watercolor tutorial series, I use Schmincke Horadam 24 Half-Pan Set. You can choose any brand and find similar colors.
Colors:
Helio Cerulean
Ultramarine
Chromium Orange Hue
Burnt Sienna
Cobalt Green Dark
Sepia Brown
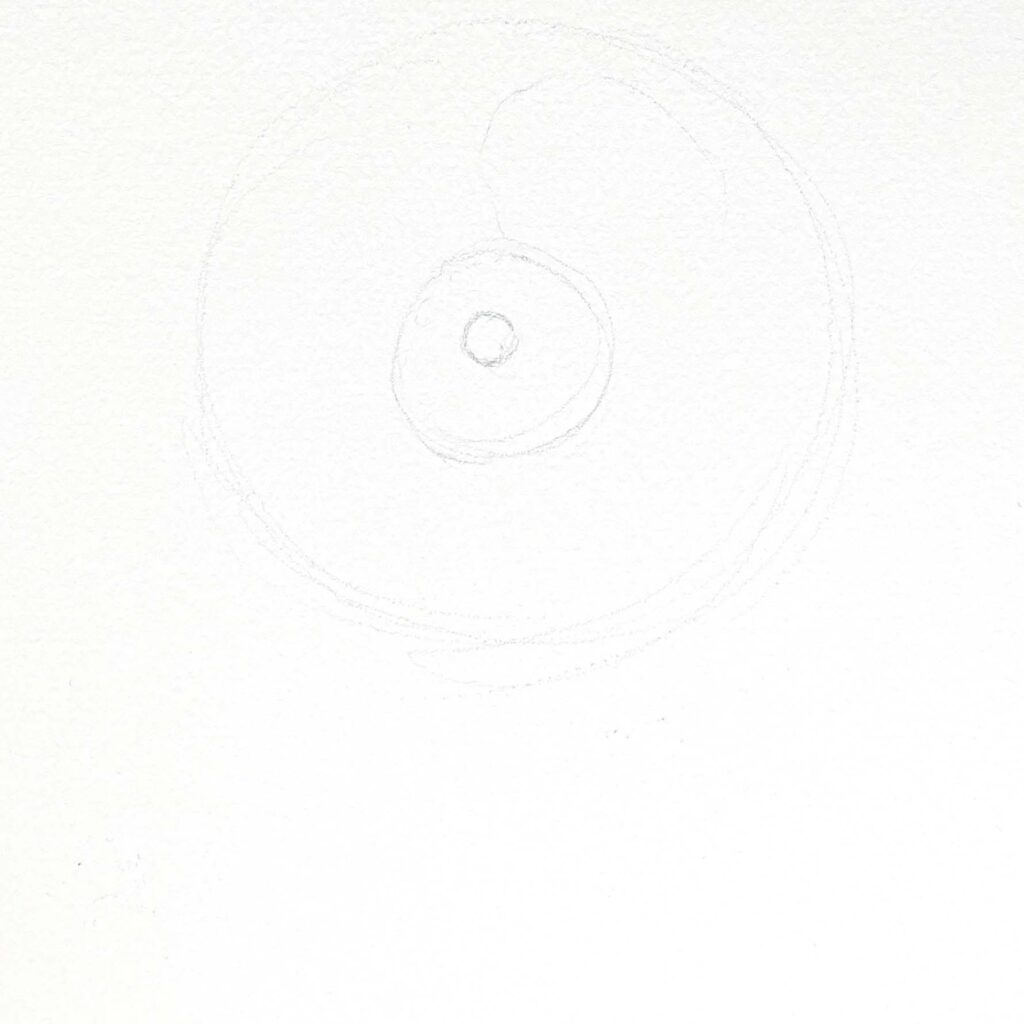
1. Blue Poppy Sketch
We start by drawing three circles—small, medium, and large—to represent the stigma, the stamen, and the range of the petals.
Add wavy petals, dense stamens, and the stigma.
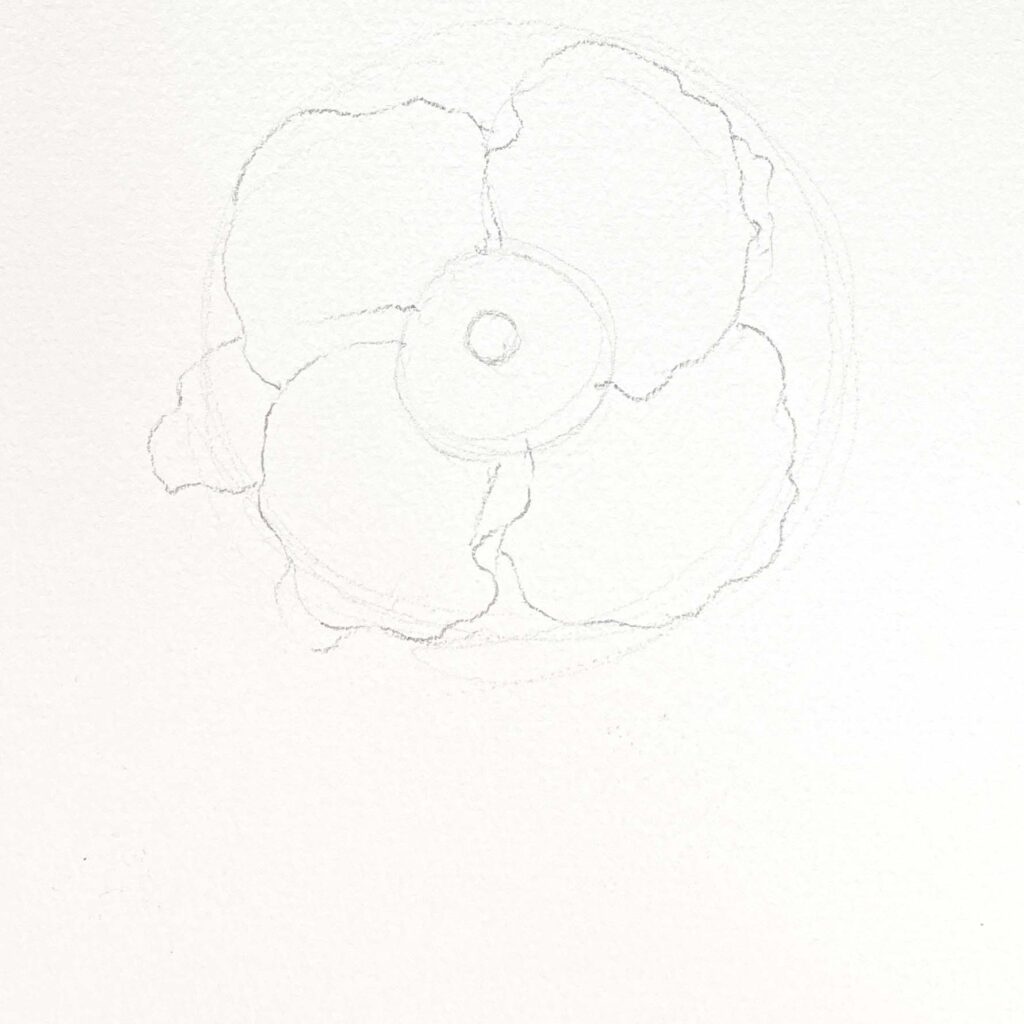
Draw the leaves, stem, and flower bud.
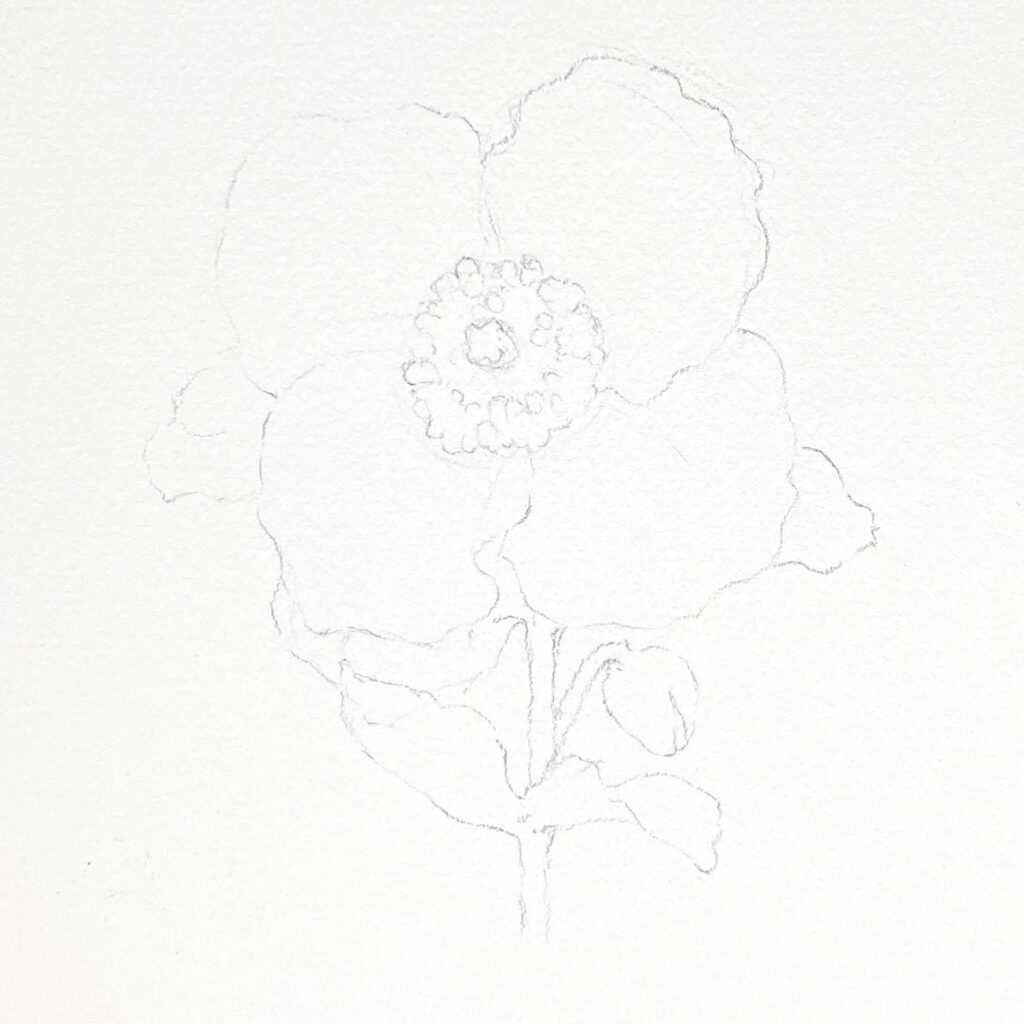
Once the pencil sketch is clean, it’s time to bring out the watercolors!
2. Painting Blue Petals
I used two blues as the main colors for the petals: Helio Cerulean and Ultramarine.
While the paint was still wet, I added more pigment around the stamen and the outer edges of the petals. I also used these colors to create some petal lines.
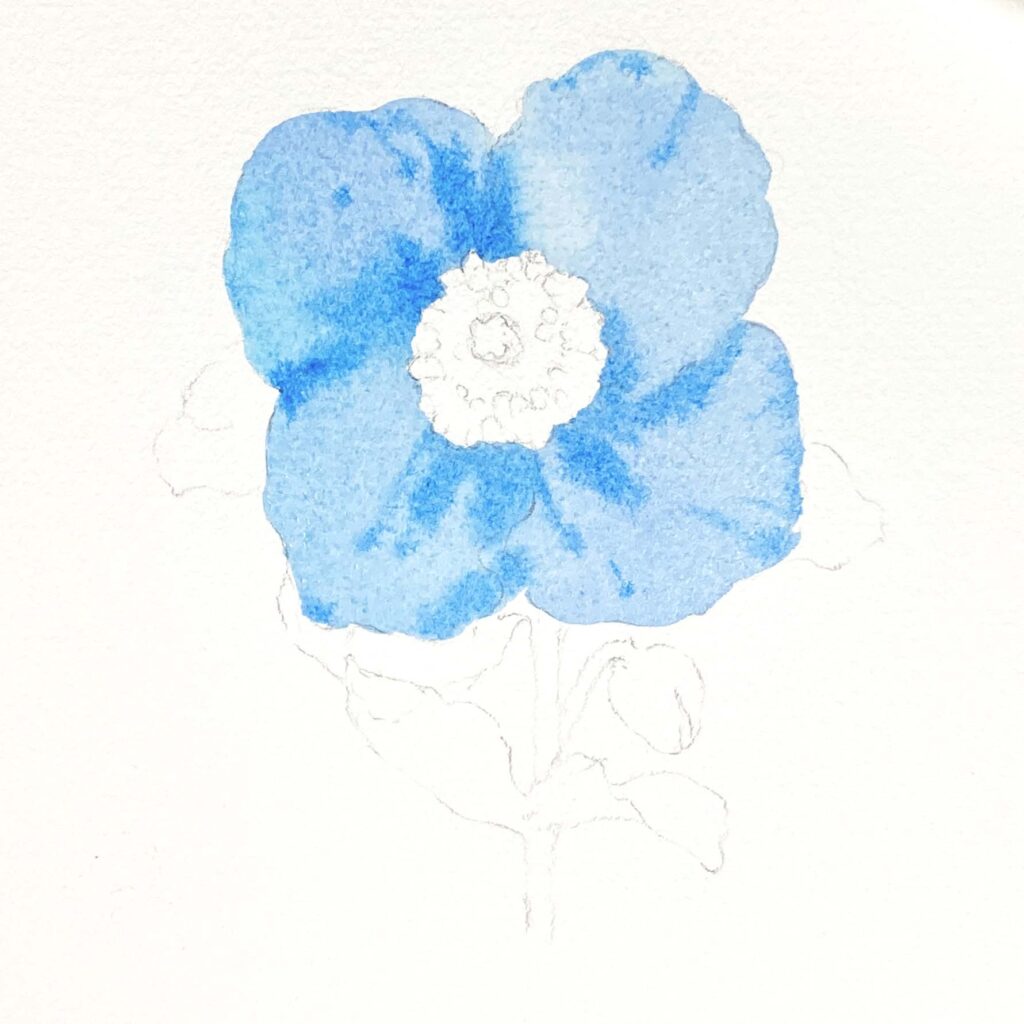
To add depth, I even mixed a bit of Sepia Brown into the blue to create a darker shade for layering.
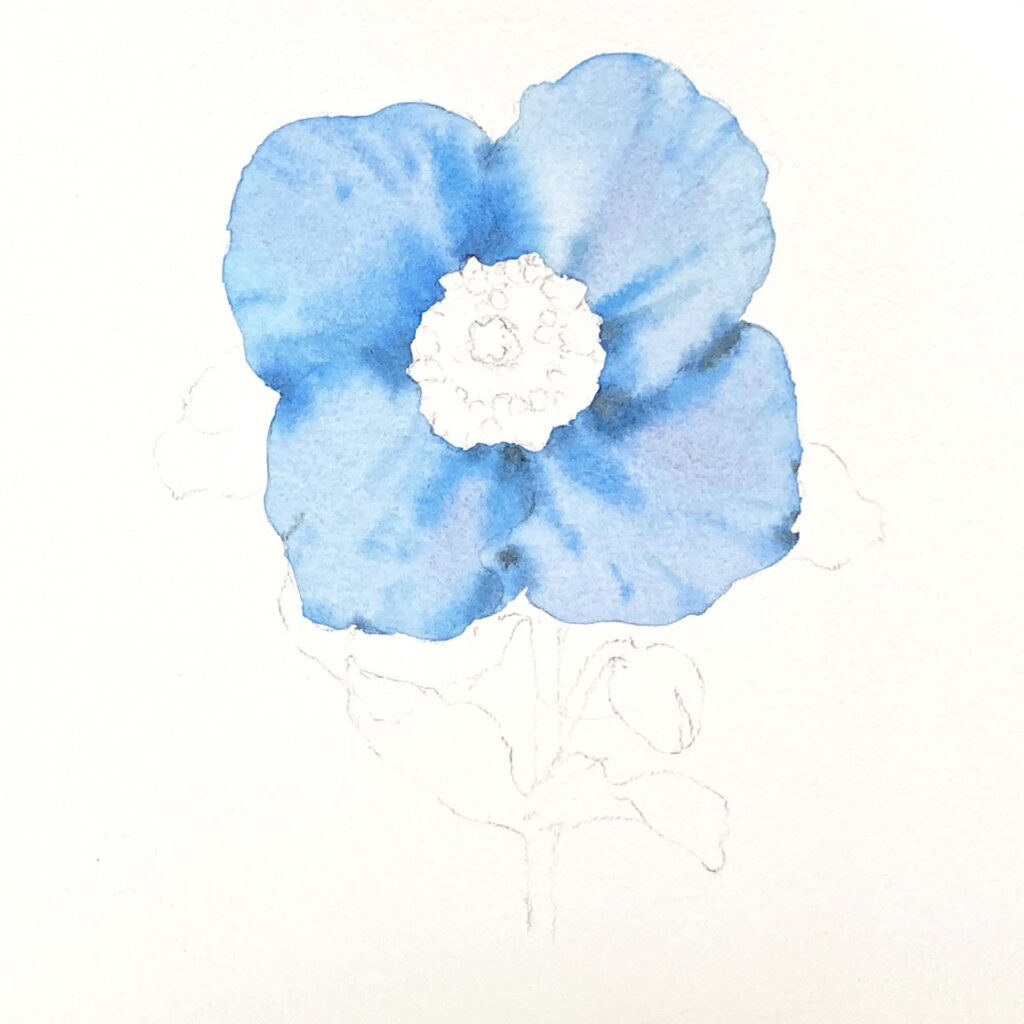
For the area around the stigma, I applied a light wash. Then, I completed the back petals using the same technique
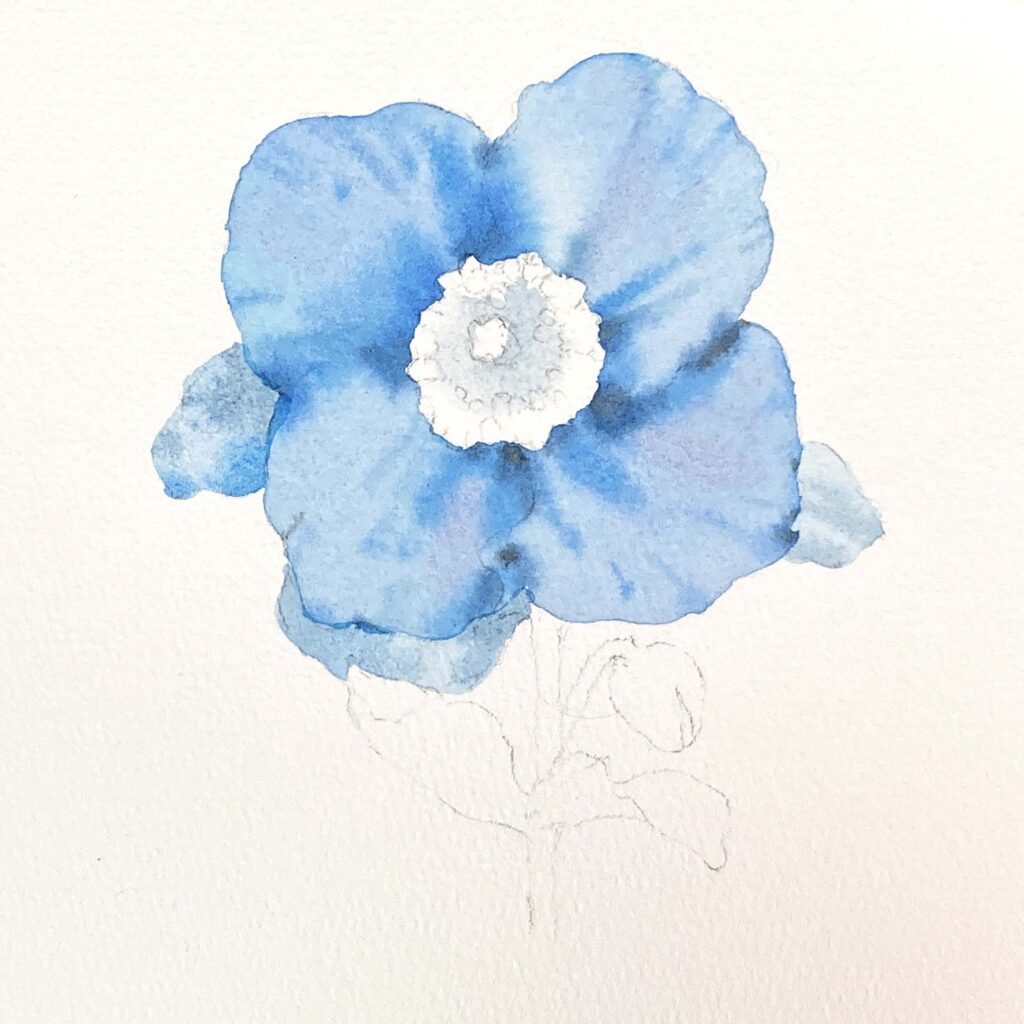
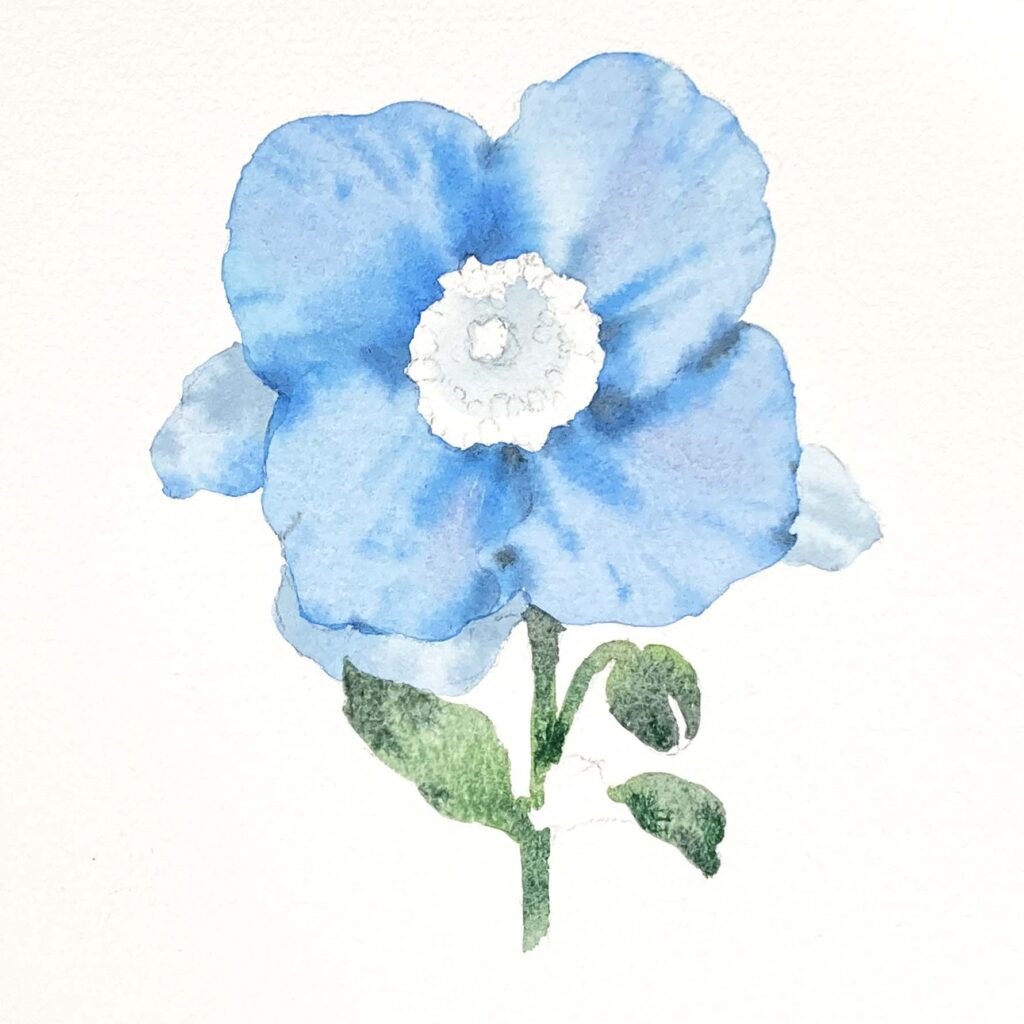
3. Stem and Leaves
First, I used Cobalt Green Dark to paint the base color for the stem, leaves, and bud. At this stage, I left the undersides of the leaves unpainted.
Next, I mixed the green with a bit of Sepia Brown or dark blue to create a deeper green, which I applied to the tips of the leaves and the stem near the base of the flower.
After letting it dry, I diluted the green I used earlier and painted the undersides of the leaves.
(I actually came back to this after painting the base color of the stamen in the next step.)
4. Stamen
For the stamen, I used a lovely Chromium Orange Hue, mixing in some Burnt Sienna for the base of the stamen. The contrast between the orange-yellow and blue is simply stunning!

Once the stamen dried, I used the same blue from the petals to paint the gap between the filaments, making the stamens stand out.

5. Details
Let’s add some delicate flower textures!
Using a small brush, I applied a slightly darker blue than the petals to add lines radiating outward from the stamen or inward from the edges of the petals. I also deepened the gaps between the petals.
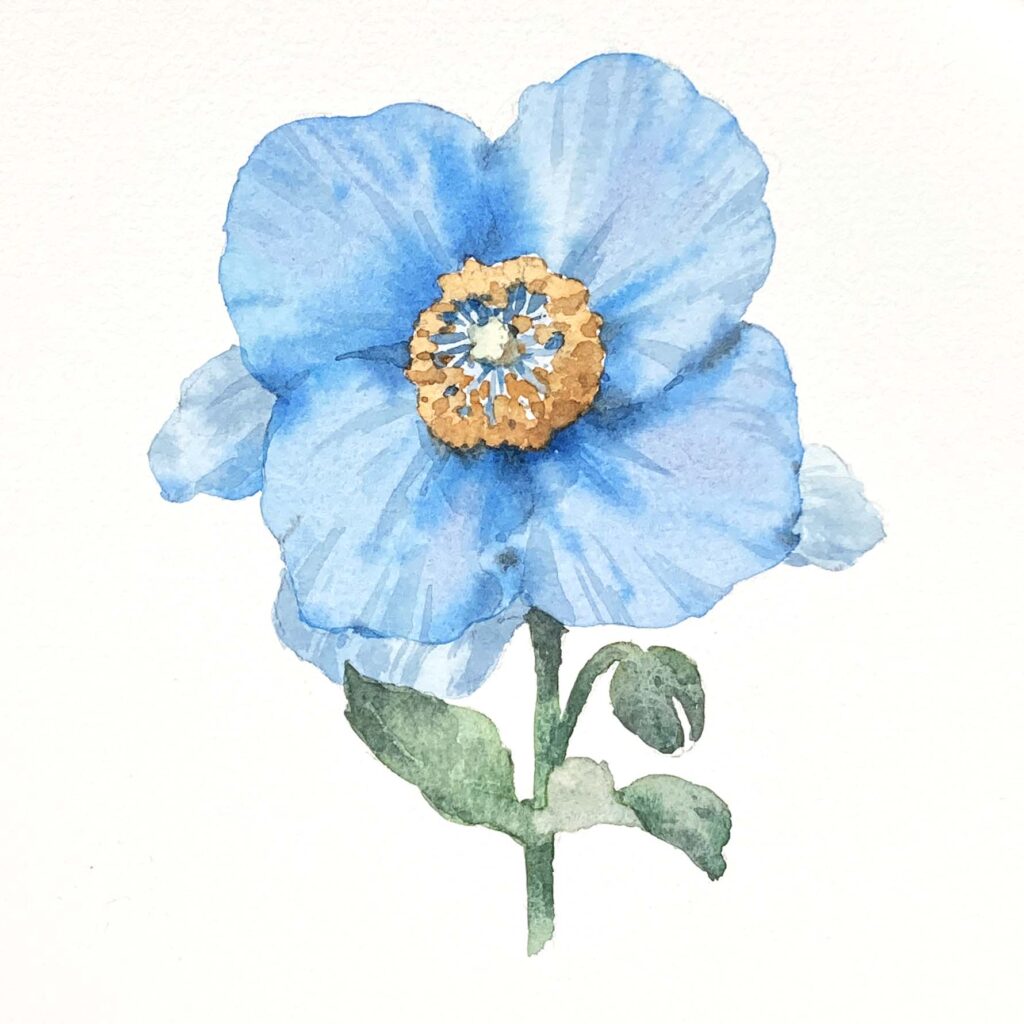
Finally, I used Burnt Sienna to add shading to some of the darker areas of the stamen. (though I didn’t apply this to every stamen).
And there we have it—a beautiful Himalayan blue poppy!

I wonder if you also enjoyed the process of painting the Himalayan blue poppy?
By focusing on the subtle variations of blue, the delicate texture of the petals, and the contrast of tones, we’ve created an elegant representation of this rare flower. I can’t wait to paint a few more!
If you have any suggestions for what I should paint next, let me know—I’m just as excited as you are for the next tutorial.
Want to remember this? Save this tutorial on your favorite Pinterest board!

Related Blog Posts:
Lean how to paint watercolor Pansies
Learn how to paint Catharanthus roseus with watercolor
How to Paint Elegant Daffodils: A Step-by-Step Watercolor Guide